 Canon’s EOS R7 is a powerful mirrorless camera that confidently handles a wealth of subjects and situations, whether used for action and wildlife, or as a solid all-rounder for anyone who doesn’t feel the need or have the budget to build a full-frame system. Highlights include an excellent autofocus system, fast burst shooting albeit with some caveats, decent built-in stabilisation, and detailed images from the 32 Megapixel sensor when coupled with a good lens. But be aware of a number of limitations which may prevent it from being the ultimate small pro wildlife body 7D II owners had hoped for. The modest buffer and SD slots limits 30fps bursts to a couple of seconds, followed by several seconds to fully clear the buffer. The electronic shutter suffers from pronounced skewing, and there’s no optional battery grip to make those heftier lenses easier to hold. Meanwhile the viewfinder panel is a little coarse for a model Canon describes as their ultimate APS-C camera. Revealingly all are addressed by Fujifilm, who’s X-H2 and S sport deeper buffers, faster card slots, higher resolution viewfinders, optional battery grips, and in the case of the S version, a stacked sensor which greatly reduces skewing effects. But both are comfortably more expensive, so the question becomes how much do you want to spend and how good is good enough? That said, those who simply want a higher-end camera with a cropped sensor may rarely if ever bump-up against the R7’s limitations and find it an altogether satisfying camera to shoot with. My only concern for them is whether Canon will release a selection of compelling RF-S lenses going forward, or whether they’re expecting owners to invest in RF lenses (or adapt EF) and view the R7 as an eventual gateway to full-frame. So while the R7 is a camera I can recommend for the money, do think carefully about whether the limitations will genuinely impact you in practice, and crucially what lenses you’ll be pairing it with should you go forward.
Canon EOS R7 review
-
-
Written by Gordon Laing
Intro
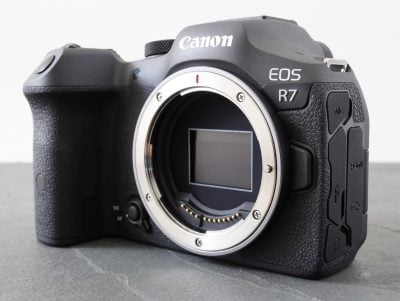
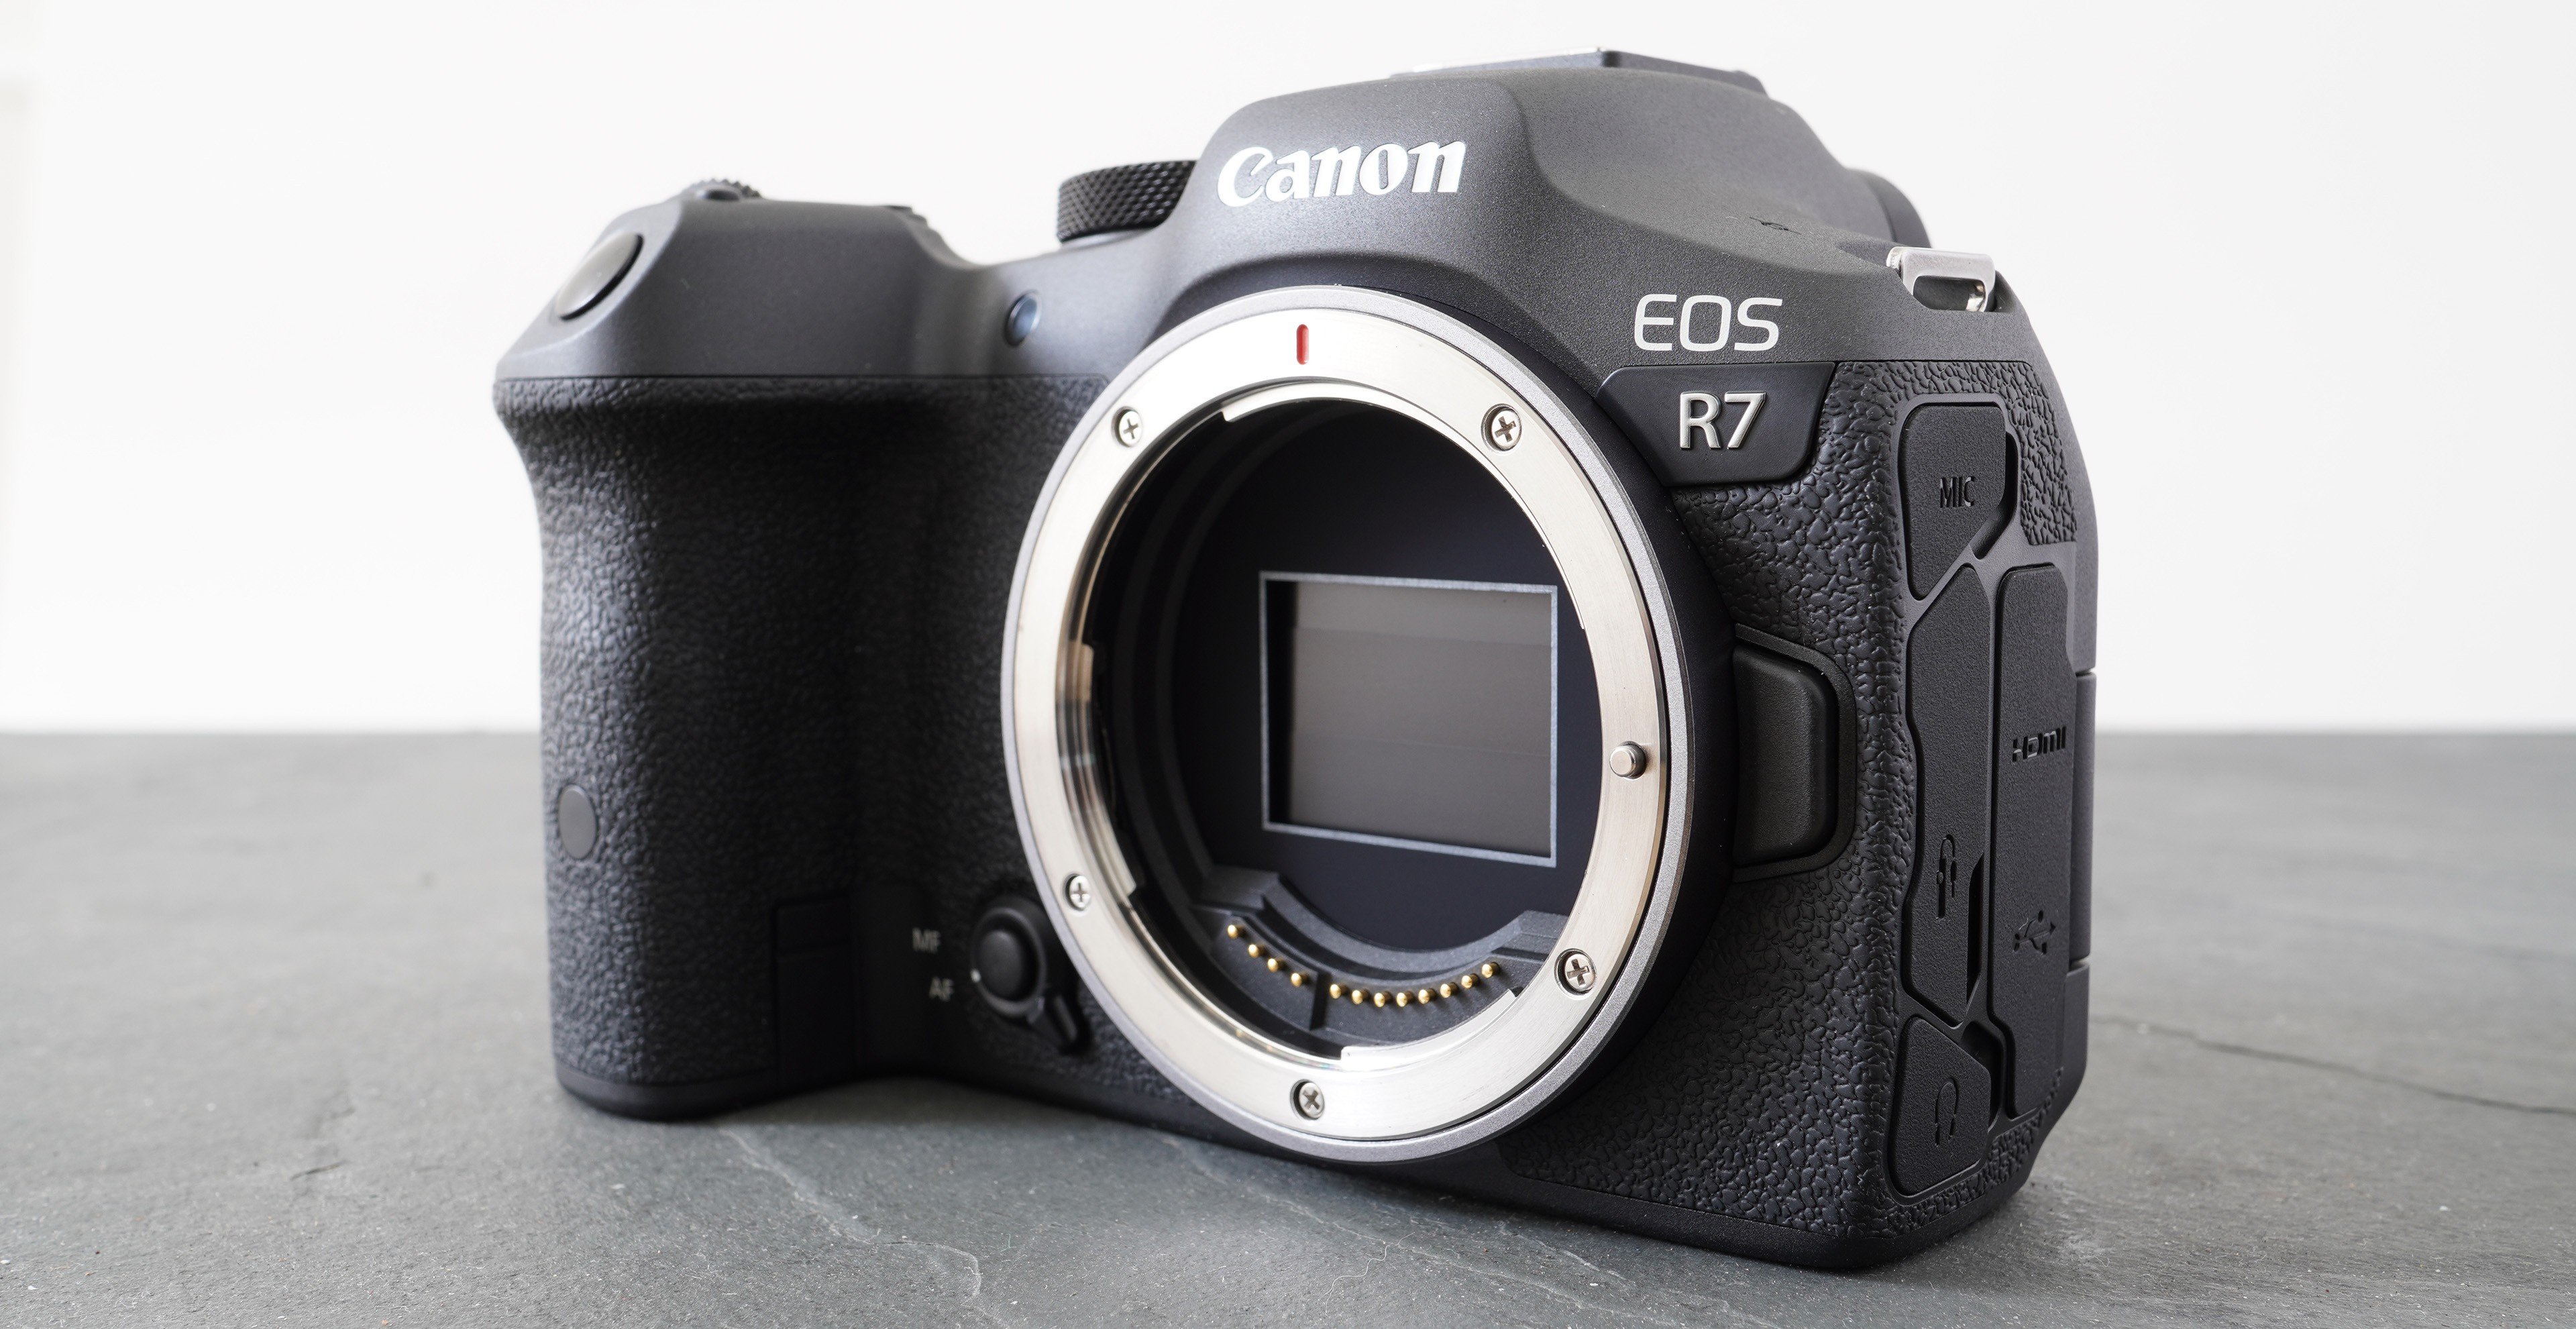
The Canon EOS R7 is a high-end cropped-frame mirrorless camera with a 32 Megapixel APS-C sensor, 4k 60p video and built-in stabilisation. Announced in May 2022, Canon calls the R7 their ultimate APS-C camera, and while not officially a successor to the 7D Mark II DSLR, the single-digit name leaves no doubt where it’s positioned.
This is a robust and fast camera that aims to satisfy demanding sports and wildlife photographers, and one Canon also hopes will convert the 7D II faithful to the World of mirrorless. Like Canon’s previous high-end cropped bodies, it also provides an alternative to full-frame models without skimping on handling or features.
My review was made with a final-production R7, and as always I’ve out everything into the video below, which concentrates on the quality and performance from a photography perspective. Meanwhile if you prefer the read a written version of the highlights, keep scrolling! Note I plan to make a second video about the video capabilities which I’ll add to here later.
My review also includes comparisons with Fujifilm’s X-H2 and X-H2S which also target the high-end APS-C market. With the X-H2 costing around 50% more, and the S version weighing in at about a grand more than the R7, they’re comfortably more expensive, but include a raft of higher-end specs which many hoped Canon would include for a mirrorless 7D II.
Let’s start by looking at Canon’s system as a whole. The EOS R7 on the right was launched alongside the lower-end and more affordable R10 on the left, which costs around $900 or pounds. Both launched the RF-S system, a new series of mirrorless cameras and lenses designed for smaller cropped-frame APS-C sensors.
RF-S bodies and lenses share the same mount as full-frame RF models, so you can fit any RF lens without an adapter albeit with their field-of-view cropped by 1.6 times due to the smaller sensor. Or indeed vice-versa, with RF-S lenses also working on full-frame EOS R bodies, albeit in a 1.6x cropped mode as they’re not designed to cover their larger sensors.
At the time of making this review, Canon had only launched two RF-S lenses, both fairly standard kit-zooms, and while the R7 can use any full-frame RF lens without an adapter, the better models are quite expensive and hefty, and there’s still some gaps in the series to fill.
Unlike Sony’s more established e-mount, there’s not yet any third party lenses for Canon’s EOS R mirrorless cameras. Fujifilm’s X-mount is also well-established with lots of lens options, including several big guns to tempt wildlife photographers.
In the meantime, EOS R7 owners can adapt any of the older EF or EF-S DSLR lenses from Canon or third parties, and on the whole these can work pretty well, exploiting the built-in stabilisation and broad AF coverage with subject recognition. There are however a number of caveats with some, typically older EF lenses unable to work at the top burst speeds, combine optical IS with IBIS, or support full AF coverage.
Your first port of call should be cam.start.canon where you’ll find supplemental information on their products which go beyond the user guides.
Here’s a table showing which lenses support the R7’s fastest burst speeds, and while you will find some big zooms and super-teles beloved of wildlife photographers, including the EF 500mm f4 and EF 100-400mm, they’re the most recent Mark II versions.
This means the older Mark I models typically shoot at slower burst speeds on the R7. It seems to be the electronic bursts that suffer the most, typically running at roughly half the top 30fps speed. But 10-15fps may still be good enough and will eek out the buffer longer too.
If you are hoping to adapt an older EF tele for wildlife photography, I’d strongly recommend checking out Duade Paton and Johnny Pink’s channels where they both have some really useful videos, and while there can be limitations, they both show some great-looking images with older lenses. I’ve popped links in the description.
If you are adapting EF lenses, one of the more intriguing options is to use Canon’s EF-EOS R 0.71x accessory launched for the C70 cinema camera. This works like a speedbooster, essentially squeezing the light-gathering goodness of a full-frame lens onto the smaller cropped sensor area while roughly maintaining its coverage.
I’d say this could be the killer accessory for the RF-S bodies, but Canon’s been strangely quiet about it and only saying operation is not guaranteed. But my friend and fellow-YouTuber Hugh Brownstone has tried it, and while he didn’t get the video autofocus performance he hoped for, it did work. I hope to try this in a separate video in the future, but if you’ve tried it on the R7 or simply adapted any older EF lenses, let me know how you got on.
Before moving on, it’s important to finally add RF-S is not compatible with Canon’s earlier APS-C mirrorless system EOS M. While this hasn’t been officially discontinued, I’d say RF-S almost certainly marks the end of EOS M development.
That said, with the entry-level R10 body alone costing close to a grand, older EOS M bodies like the M50 and M200 remain on sale as more affordable options for those getting into mirrorless on a tighter budget, plus they too can adapt EF lenses.
Before delving into image quality and autofocus, I wanted to briefly mention some design pros and cons of the R7 now I’ve had longer to shoot with it. First things first: the R7 feels as solid and robust as models like the R5 and R6 and is also sealed against dust and moisture. Weighing 610g with battery it can’t help but lack the reassuring heft of the 7D II, which weighs around 50% more, but only time will tell if it’s actually any less tough as a result.
The EOS R7 does employ magnesium alloy in its construction, but the design and materials mean it’s not only lighter than the 7D II, but at 130x90x92mm, smaller all-round too. It’s also very close in size and weight to Fujifilm’s X-H2 and S.
Compact size is a double-edged sword though, and while a smaller, lighter camera is easier to carry around for day-to-day use, it’s not as comfortable when wielding the kind of big lenses loved by wildlife and sports photographers.
The traditional solution is to fit an optional battery grip, but frustratingly Canon’s decided not to offer one for the R7. While the battery door can be removed, providing access to the power contacts for a stalk or dummy should a third party decide to have a go at making one, there’s no connectivity to support duplicate portrait controls.
If you never use grips, you’ll wonder what the fuss is about, but for owners of heavier lenses, it can be a deal-breaker. Indeed I’ve seen some R7 owners modifying older grips not to accommodate extra batteries or provide portrait controls, but simply to give them something more to hold onto. It’s particularly annoying for 7D II owners who may have come to rely on a grip and not be that happy about losing it if they upgraded to the R7.
I’m sure there may be a basic third party grip in the future, albeit lacking portrait controls, but in the meantime the lack of an official solution is an own-goal that will see some potential R7 owners consider the X-H2 or S instead. The irony being while Fujifilm does sell grips for those models, it too is facing criticism for not offering one for their smaller X-T5 as well. Come on camera companies, literally, get a grip!
I’m also going to throw some shade on the rear wheel control, which while better than I first thought, is still not a patch on the old wheel on models like the 7D II, which to me represents one of Canon’s all-time ergonomic triumphs. And speaking of the 7D II, there’s no top screen here either, a feature which is included on the X-H2 and S.
I will however award Canon bonus points for listening to my feedback and equipping the R7 – and R10 – with an AF / MF switch by the mount, allowing them to quickly and easily set the more affordable RF lenses between auto and manual focus without entering a menu.
Yep, for those unfamiliar with the RF lens range, some of the cheaper lenses don’t actually have an AF / MF switch of their own. Note RF lenses which do have a focus switch take priority over the one on the body.
Moving onto composition, the R7 employs an electronic viewfinder with a strangely modest 2.36 million dot OLED panel. While this won’t affect the potential quality of your final images, it’s simply not as nice to look through and use as a more detailed panel.
You’ll notice it on the finest details like distant railings or grills which can look mushier than models with higher-res viewfinders whether during composition or playback, and the more detail you have, the more easily you’ll be able to nail manual focus.
On the plus side, the magnification is respectably large and the option to double the refresh from 60 to 120fps can deliver a smooth image as you pan quickly, although note when continuously autofocusing, the display will temporarily revert to 60fps. Like other electronic viewfinders, the faster refresh will also consume more power.
Speaking of which, lower resolution viewfinder panels can actually consume less power, but I think it’s more about saving money here, and for me personally the R7’s EVF is one of the more surprising decisions made by Canon. If it was a budget model, maybe, but if Canon’s describing the R7 as their ultimate APS-C camera, it really deserved something better.
This is another specification where the Fujifilm X-H2 and S take the lead with their 5.76 million dot viewfinder panels delivering a more premium experience, albeit again at a higher price.
Canon and Fujifilm have however shared an almost identical approach on screens, with the R7, X-H2 and S sharing similarly-sized 3in panels with 1.62 million dots and fully-articulated mechanisms, allowing them to twist and flip to almost any direction including forward to face you or back on itself for protection. It’s interesting to recall the 7D Mark II’s screen was not only fixed in position, but not touch-sensitive either.
Oh and in case you wondered, the R7’s screen can double-up as a touchpad for repositioning the AF area when you compose through the viewfinder as an alternative to using the joystick. If you like, you can also tap the screen to start a long exposure in Bulb mode before tapping it again to stop it – careful not to wobble it though.
A brief note on connectivity: the R7 has Micro HDMI, USB-C, 3.5mm microphone and headphone jacks, and a remote jack, but lacks the PC Sync port of the 7D II, not to mention the X-H2 and S. The two Fujifilm’s also boast full-size HDMI ports and I truly wish Canon would follow-suit sooner rather than later as the Micro versions they seem to have standardised on really are far less robust.
Meanwhile the hotshoe, inherited from the EOS R3 and R5C, supports additional accessories including microphones with direct audio connections. But unlike the cheaper R10, there’s no popup flash.
Like most cameras, GPS location data is available by linking your phone over Bluetooth, unlike the 7D II which was one of the last bodies to actually include GPS hardware in the head.
For storage, the R7 has twin SD card slots supporting UHS-II speeds. You can set them to overflow for stills, or backup for stills or video, or have them record stills to one and video to the other. While it’s a relief to find twin slots here, many will be disappointed Canon didn’t swap one of them for a faster CF Express slot as seen on the Fujifilm X-H2 and S, as well as Canon’s own R5. By sticking with SD, the R7 suffers from reduced buffer size as well as increased flush times.
For power, the EOS R7 employs a familiar battery, the LP-E6NH, which is quoted as delivering up to 770 shots with the screen under CIPA conditions. This is a little more than Fujifilm claims for the X-H2 and S, but all will be less than 7D II owners will remember with their optical viewfinders which consume much less power.
And if you want more power, you’ll need to carry spares as once again the R7 does not support a battery grip, unlike the X-H2 and S, not to mention the old 7D II.
You can recharge the R7’s battery using a USB Power Delivery source, with both my MacBook and Galaxy S chargers working fine. If you’re a 7D II owner, the R7 will also not only work with your older LP-E6N packs but also charge them internally over USB which the 7D II could never do. But older LP-E6 or unauthenticated batteries will need to be charged externally. Note older batteries may not achieve the top drive speeds.
Ok now for the sensor and image quality. The R7 features an APS-C sized CMOS sensor with 32.5 Megapixels. This is almost certainly based on the same sensor in the M6 II and 90D, with much the same resolving power, but Canon claims to have improved the microlenses and circuitry which, coupled with the newer DIGIC X processor, may provide faster speed and lower noise.
Also notice how the shutter closes to protect the sensor from dust when the R7’s powered down like the EOS R. In contrast, the cheaper R10 follows the RP’s strategy of leaving it exposed since the target buyers may not appreciate how fragile the shutter curtains are.
In terms of photo quality, you can record 32 Megapixel images with 6960×4640 pixels in either JPEG, HEIF or 14 bit RAW formats. Compressed RAW and lower resolution JPEG or HEIF options are also available.
The images are a big step-up in potential resolution over the old 20 Megapixel 7D II, not to mention higher than the 26 Megapixel X-H2S, albeit falling short of the 40 Megapixel X-H2 and X-T5. It’s easy to quote numbers, but I’ll compare their actual resolution in a moment.
Like all APS-C systems, the smaller sensor is the key, not only cheaper to manufacture but effectively magnifying the view from all lenses by 1.6x while still maintaining the full image resolution – this makes them perfect for distant wildlife.
For example the R7 packs all of its 32 Megapixels into the smaller APS-C area, versus the EOS R5 which may start with 45 Megapixels over the full-frame area, but falls to around 15 when cropped to the same degree. The smaller sensors also allow more compact bodies and lenses to be developed.
To see how the R7’s resolution compares with different lenses and rival cameras, I photographed my standard resolution chart starting with one of my sharpest lenses, the Sigma 40mm f1.4 ART, an EF model, adapted here to the RF mount. I have it closed here to f5.6 where it delivered the best result.
Taking a close look shows this camera and lens combination almost out-resolve the chart, but what about when you use other lenses?
To find out I’m going to keep the Sigma 40mm sample in the middle, and flank it with the two RF-S kit zooms, with the 15-45mm on the left and the 18-150mm on the right, both with their focal lengths adjusted to match the field of view – interestingly both reported being at 45mm here in their EXIF data. Again I shot at all apertures and chose the best result: f8 for the 15-45 and f5.6 for the 18-150.
You can see straight-away that while the 18-150 result is superior to the 15-45, neither zoom matches the crispness of the Sigma prime in the middle, as indeed you’d expect for a top-end prime versus a pair of kit zooms.
That said, plenty of R7’s will be sold in a kit lens bundle, so if you really want to exploit the maximum detail, you should pair it with something better sooner rather than later.
But what about the APS-C competition? Let’s keep the R7 result in the middle, but flank it with two of Fujifilm’s latest models: the X-H2S on the left with 26 Megapixels and the X-H2 on the right with 40. Fujfilm is gradually redeploying its 40 Megapixel sensor on other bodies, so this result also applies to the X-T5 and any future models that share it.
Here the 26 Megapixel result on the left is clearly out-resolved by the other two, but I’d say the difference is much closer between the R7 and X-H2 results in the middle and right. The X-H2 is slightly out-resolving the R7, but not by a huge margin.
But the X-H2 has an additional trick up its sleeve, a pixel shift composite mode that captures a burst of images, while subtly shifting the sensor between each. These can then be combined in software later to generate a result that’s potentially more detailed while reducing colour moire artefacts.
So let’s swap the single 40 Megapixel frame from the X-H2 on the right for one captured with its pixel shift mode, where you can see it striding ahead of the others. Now before you get too excited, this mode currently works best with completely static compositions, so it’s more appropriate for studio-based product or archive than outdoor landscapes, but this test does show its potential.
Next for a sweep through the sensitivity range from 100 to 51200 ISO. This time I photographed my colour checker chart and will zoom-in for a closer look. I’m going to place the out-of-camera JPEG on the left and a RAW version on the right where I’ve deliberately processed the latter without any noise reduction. This isn’t how you’d normally process RAW files, but is useful to reveal when the noise starts to appear and how much you’ll need to deal with.
At 100 and 200 ISO, the R7 is looking pretty clean for JPEG and RAW, with only a slight hint of noise speckles on the RAW at 400. There’s a mild increase in noise on the RAW at 800 that becomes more noticeable at 1600, at which point the JPEGs remain impressively clean. At 3200 ISO, there’s a hint of noise textures on the JPEG on the left but a steady decline on the RAW and a bigger loss at 6400 ISO, at which point the JPEG still looks pretty good.
From 12800 ISO onwards, there’s lots of noise to deal with on the RAW files, but the JPEG noise reduction keeps it pretty under control up to 25600 ISO. The highest sensitivities understandably look pretty bad, but may be usable for smaller reproductions.
So overall the R7’s JPEG engine is doing a good job with the data it’s fed, and I wouldn’t say the Fujifilm X-H2 and X-H2S looked significantly different in my noise tests, certainly not enough to swing a buying decision.
Next for a quick look at dynamic range and a photo I took of the Gherkin building in the City of London, flanked by buildings in deep shadow when I exposed for the middle.
With the RAW file opened in Adobe Camera RAW, I was able to reveal detail in those dark areas using the shadows slider, or for a more extreme adjustment, here’s how it looks with five stops of positive exposure compensation.
Looking closely at the boosted area unsurprisingly reveals some noise to deal with, but on the whole it’s possible to retrieve shadow and highlight details from subjects that were under or over-exposed.
Next I’m going to test the built-in sensor shift stabilisation, or IBIS for short, which Canon claims is good for up to eight stops of compensation when working alongside certain RF lenses with optical stabilisation.
Here’s the view through the R7 fitted with the RF-S 18-150 zoom at 150mm with stabilisation disabled, where the view is understandably wobbly. Note the hand icon at the top indicating no stabilisation, before going into the menus and enabling it, then returning to a much steadier view.
Note the hand icon has a plus symbol next to it, indicating the body IBIS and lens optical stabilisation are working together for the best result. Canon claims up to seven stops for this combination, so let’s see what I managed in practice.
Here’s a shot I took with the R7 and RF-S 18-150 at 150mm using the slowest shutter speed I could successfully handhold a sharp result, in this case 1/ 8, although my result at 1/ 4 was only marginally wobbly.
And now on the right the same combination at 1/ 8, but with stabilistion disabled, where the result is ruined by shake. Indeed on the day I needed a shutter speed of 1/250 for a sharp result handheld without stabilisation, so here the camera and lens effectively gave me five stops of compensation. Not seven, but still ok.
But what about lenses without optical stabilisation? I switched to my old EF 85mm f1.8, a lens without IS, seen here mounted on the R7 without stabilisation enabled where the view is again very wobbly. And after enabling it in the menus and returning to the live image, you’re now looking at sensor-shift IBIS alone. For me this is where IBIS really comes into its own, making non-stabilised lenses much easier to compose with.
The slowest speed I could handhold the 85mm on the R7 with IBIS was 1/15 and you’re looking at that result now. My result at 1/ 8 was only a little wobbly. Compare it to the image on the right, also taken at 1/15 but without IBIS enabled and the benefit is clear.
On the day I actually needed a shutter speed of 1/250 to handhold the 85 on the R7 without IBIS, so the camera was effectively giving me four to five stops of compensation in practice.
Next for focus, with the R7 employing Canon’s Dual Pixel CMOS AF II with 100% coverage across the frame, operation down to -5EV with an f1.2 lens, and a wealth of subject detection including humans, animals and vehicles. Suffice it to say it’s a huge step-up over the 7D II and a reason alone to consider upgrading, albeit not dissimilar to the best of its current rivals.
Let’s start with a single autofocus test using the RF-S 18-150 at 150mm f6.3 from fairly close range. Here you can see the R7 and the zoom snapping into focus immediately without any worries or perceptible delays.
But what about adapted EF lenses? Here’s the old EF 85mm again, wide-open at f1.8 and this time it’s visibly slower than the RF-S zoom, but this is literally about as fast as this lens can physically focus with its old USM motors. It’s certainly no slower than when mounted on a DSLR, and again you get the benefits of full coverage and subject detection here.
So how about that subject detection in action, starting with face tracking using the RF-S 18-150mm at 35mm f5. As I entered the frame, the AF system placed a box over my eye immediately, and half pressing the shutter started tracking it with continuous Servo AF and the box turned blue for confirmation.
Notice how quickly the system picks my eye again as I turn around, and once I start walking away how the R7 recognises my head as the subject. At longer distances, this turns to body detection with a success rate that’s similar to Sony’s latest AI system on the A7R V.
Here’s another example, this time using the RF 24mm f1.8, at f1.8 of course, where again the camera and lens have no problem keeping my eye tracked while facing the camera, switching to my head when I’m turned away. But this has been bread and butter for Canon for some time, so let’s move onto something more challenging.
The R7 will undoubtedly become a popular choice of wildlife photographers, so I wanted to try it out with the Seagulls of Brighton. I was particularly interested in seeing how a more affordable setup could work out, so for my bird-in-flight tests, opted for the more affordable RF 100-400mm zoom. It’s considerably cheaper, not to mention smaller and lighter than the premium RF 100-500mm L lens, so let’s see how it got on.
Here’s a few recordings of the AF system in action, mostly with the lens zoomed all the way to 400mm. Note the plus sign on the hand icon indicating the combination of IBIS and optical IS, as well as the square box in the middle indicating my preferred option of a Zoned AF area. The system also works well with the full area, but with busy backgrounds, I prefer to give the system something to start with. You can also customise the size and shape of the zoned area as well as move it around the frame.
First things first, unlike Sony, Canon groups birds and animals together, so no need to specify in the menus. Secondly, notice how when distant the bird’s body is recognised and framed by a box, but as soon as the camera is able, it’ll switch to head and then eye-detection, features which again Sony is boasting about on the A7R V.
For comparison, here’s Fujifilm’s X-H2S with bird selected as the subject type, where it appears to identify the seagulls, but sometimes lag a little behind on the display update. I still managed plenty of keepers with the X-H2 and S, but Canon’s detection and tracking felt stickier to me in these conditions.
In terms of shooting bursts, the R7 can shoot at up to 15fps using the mechanical shutter or up to 30fps with the electronic shutter; the latter also allows you to photograph in complete silence, albeit with the risk of skewing on fast subjects or pans which I’ll show you in a moment. Note you will need a battery with a decent level of charge to achieve the top-speeds.
So here’s a quick sequence I shot with the mechanical shutter and single autofocus, and checking the timestamps on the images confirms the 15fps speed.
Next here’s the same action, but shot with the electronic shutter at its top speed of 30fps, again confirmed here by checking the timestamps. But this is a static subject and a relatively short burst.
Here’s some bursts of Seagulls in flight using the R7 fitted with the RF 100-400mm zoom, mostly towards the long-end of its range and using a large Zoned area in the middle with Servo AF and bird detection enabled.
You’re looking at a mix of mechanical and electronic JPEG bursts taken at their respective top speeds of 15 and 30fps, and the first good news is I again confirmed these speeds in practice by checking the image timestamps.
I used manual exposure with Auto ISO, the maximum lens aperture and a fixed shutter speed of 1/2000. Like the 7D II, the fastest mechanical shutter remains 8000th of a second, but unlike the ageing DSLR, the silent electronic shutter mode can fire at up to 16,000th of a second.
If you’re using a flash – external of course in the absence of a built-in flash – the R7 offers a sync speed of 1/250 with the fully mechanical shutter or 1/320 with the electronic first curtain option, but like many cameras, there’s no flash sync with the fully electronic shutter. This tends to be reserved for cameras with stacked sensors that have much faster readout.
In terms of buffer, Canon claims up to 224 JPEGs or 51 RAWs using the mechanical shutter at 15fps. In my tests I managed 132 JPEGs in 8.9 seconds, confirming the 15fps speed before the camera slowed to around 4fps. Once I stopped shooting, it took seven seconds to fully write the buffer to a fast SD card.
Set to RAW, I managed 47 shots in 3.2 seconds, again close to 15fps, before the camera slowed to around 4ps; again the flush time was about seven seconds.
Switching to the 30fps electronic shutter, Canon claims up to 126 JPEGs or 42 RAWs at 30fps. I managed 60 JPEGs in two seconds, confirming the speed, with a six second flush time. In RAW I managed 32 shots in just over a second, again confirming the top speed, but taking 17 seconds to flush the buffer.
Judging from my results the R7 can certainly shoot quickly, but the buffer isn’t huge and the card speed means it can take some time to fully clear. Indeed with just one or two second’s worth of action in RAW or JPEG respectively using the 30fps speed, you’ll need to be very careful when to start shooting.
If you want longer bursts you’ll need to slow the speed down or opt for smaller file types. If you absolutely need RAW but want longer bursts, you can roughly double your shooting time by using Compressed or C-RAW without much compromise in quality.
Ultimately it is what it is. Canon chose a fairly modest buffer size and SD slots to keep costs down, and this in turn has impacted the burst size. In contrast, Fujifilm opted for a larger buffer and the option to use faster CF Express cards for longer bursts on the X-H2 and S, but this in turn makes them more expensive.
Again though, if you can shoot at 15fps and use C-RAW or JPEG, you will enjoy decent bursts with the R7. Only you can decide if this is good enough for you, but certainly the 30fps mode proved quite limited in practice.
If it’s any consolation, you may have already ruled out the 30fps mode due to rolling shutter, where skewing can become visible on moving subjects or fast pans. You may have already noticed it on some of my bursts of the Seagulls taken with the electronic shutter where the buildings in the background leaned over as I panned.
To show it in action, here’s a pan taken with the mechanical shutter using a 50mm focal length where the bottle, as you’d expect, stands vertically.
But now here’s a version shot electronically where the pan has resulted in some visible skewing with the bottle leaning to the side.
This effect is magnified at longer focal lengths, so here’s how Brighton Pier looks when panning across it at 400mm, at the kind of speed you’d use when following a bird in flight. If the subject were against the sky you may not notice, but when panning in front of buildings or trees, the skewing effect can be quite off-putting.
As such I’d mostly prefer shooting with the R7’s mechanical shutter to avoid this, while also extending my burst depth. But if you’re desperate for 30fps or to shoot in silence, just be careful of motion.
There is however another compelling use-case for electronic shooting, and that’s the R7’s RAW Burst mode. This shoots at 30fps but has a pre-shot option which keeps a rolling buffer of the past half-second’s worth of shots as you keep the shutter half-pressed. Once you fully push, this earlier half second is committed to memory, followed by a short burst afterwards.
Here’s how it works in action. Notice the bar on the left indicating my buffer and that it’s already partly filled with pre-shot frames. I actually pushed the shutter fully down as the block hit the water, knowing I’d probably miss some action but that I already have half a second’s worth in the bag. You’ll see the buffer bar fill in a few seconds before it turns red to indicate its full.
Here’s the view in playback starting with frame 16 of 81, which is the moment I pushed the shutter down. Like normal bursts I can go forwards, but the clever part is also being able to go backwards to the time before I fully pushed-down, where I have 16 frames of action representing half a second.
Here it lets me find the moment the splash began, or even when the block was still in the air, before then letting you extract whichever frames you want as a JPEG, HEIF or RAW file.
There are some caveats of course: the maximum number of frames is 96, with 16 before and up to 80 afterwards, representing just over three seconds of action in total. Canon also stores them all in a single, rather hefty file which you’ll need to navigate and extract during playback. But it’s clear how useful it could be for capturing the moment a bird takes flight or lands on a perch.
Before wrapping-up, I wanted to mention some other photographic modes that are often overlooked in reviews. The R7 includes both interval and Bulb timers for timelapse and long exposure photography.
There’s also a multiple exposure option which can combine two to nine frames, and the first image can be a JPEG file from your card which you took earlier. Not all cameras allow this.
Finally, there’s Focus Bracketing which lets you automatically capture a burst of images using the electronic shutter, while the focus is shifted a little between each. These can then be stacked to greatly increase the depth of field and is a valuable tool for macro photographers.
Here’s how it works in action, where you can choose the size of the burst and the focus increment between each frame – you’ll need to experiment with both in order to grab enough frames to cover your subject from the closest to the furthest.
Many cameras offer focus bracketing but force you to stack the images in software later. You can of course still do this with the R7, but it also offers a Depth Composite option which generates a stack in-camera.
Here I’ve started on the closest point of the subject, before letting the R7 rack focus to the most distant point. It then takes a few seconds to stack the images if you’ve selected this option.
Here’s the final stacked image, generated in-camera and as you can see it’s all in sharp focus from front to back, revealing all the detail without having to close the aperture down and suffer from diffraction.
Check prices on the Canon EOS R7 at B&H, Adorama, WEX UK or Calumet.de. Alternatively get yourself a copy of my In Camera book, an official Cameralabs T-shirt or mug, or treat me to a coffee! Thanks!