Canon EF 8-15mm f4L Fisheye USM review
-
-
Written by Gordon Laing
Intro
The Canon EF 8-15mm Fisheye zoom is a unique lens and one for which anticipation has been steadily building since its original announcement back in August 2010. Now one year on, the lens has finally hit the stores and I’ve had a chance to see what all the fuss is about in my review.The EF 8-15mm is special because it effectively delivers four lenses in one: Canon DSLRs with full-frame, APS-H or APS-C cropped-frame sensors all get to enjoy full 180 degree fisheye images which fill the image, while full-frame owners enjoy the additional option of full circular fisheye images.
Previously this would have required four different lenses, one of which didn’t even exist: until now, there was no option for APS-H bodies to capture a 180 degree fisheye view which filled the image. So if you’re a fan of extreme wide-angle coverage and own multiple Canon bodies with different sensors, or are simply wanting a fisheye lens which will cover you for future upgrades, this is going to be a very tempting proposition.
This lens is unashamedly about extremes. It captures an enormous field of view, and like other fisheye lenses, makes no attempt to correct the huge barrel distortion which renders straight lines into bananas. A mere tilt up or down will have a dramatic impact on the geometry of the image if desired, but careful choice or positioning of subjects can actually hide much of the distortion if preferred. Action photographers can dwarf athletes by their surroundings, macro shooters can make their subjects look enormous and those with a scientific or meteorological bent can capture the entire sky right up to the horizon. Meanwhile an enormous depth-of-field ensures a huge range of distances is in sharp focus – and once again that massive 180 degree angle of view is now available to cropped and full-frame bodies with a single lens.
Since this is such an unusual and exciting lens I’ve decided to take a slightly different approach to my review. In addition to my usual build report, image quality comparisons, sample images and videos, I’ve asked other photographers to try out the lens for an alternative perspective. You can find them in the field reports!So for a complete report of the most original lenses in recent years, check out my Canon EF 8-15mm f4L Fisheye USM review!
Canon EF 8-15mm Fisheye optical design
The Canon EF 8-15mm Fisheye is a unique lens in terms of optics with a couple of surprises I’ll come to in just a moment. But first a brief mention of the actual optical design which consists of 14 elements in 11 groups, seven diaphragm blades and a constant f4.0 focal ratio throughout its range. Some may be disappointed it doesn’t share the f2.8 aperture of the existing EF 15mm fisheye, or the Nikkor 14-24mm zoom, but in use you rarely miss the extra stop.
There’s already such a massive depth-of-field even at f4 that shooting at f2.8 wouldn’t exactly blur backgrounds, while the coverage is so wide you can easily shoot at slow shutter speeds without needing the extra light. Astro-photographers always appreciate an extra stop, but for those very long fisheye exposures of trailing stars the aperture is normally closed down a little anyway. The bottom line is while brighter is always nice to have it’s not missed on the EF 8-15mm Fisheye. Besides equipping it with an extra stop would have made the lens much larger, heavier and more expensive.
There’s no Image Stabilisation, which may not come as a surprise – again the ultra wide coverage means you can successfully handhold this lens at relatively low shutter speeds. That said, IS can be a valuable ally when filming video, and I noticed wobbles on some handheld footage which stabilisation could have ironed-out. The temptation with this lens is to get extremely close to your subject, so even though there is a massive field of view behind it, you may still notice surprisingly small movements in the foreground. The bottom line is this lens is not immune to visible wobbles when filming video, so beware.
The next surprise concerns the closest focusing distance: a mere 15cm which compares favourably with the 20cm of the earlier EF 15mm fisheye. Remember both distances are measured from the focal plane rather than the front of the lens, so in reality you can focus on a subject that’s about an inch from the front element. This can be pretty hairy in practice as you find yourself getting closer and closer to a subject just to render it into a decent size, before glancing up to find it almost touching that precious front element. You’d also better get used to funny looks from passers-by as you virtually prod your subject with the lens.
The biggest surprise though concerns the coverage. Unless you’re familiar with the way fisheye lenses work, you’d naturally assume an 8-15mm zoom would deliver just under a 2x range from wide to really wide. But in reality there’s virtually no zoom at all on this lens, at least in the conventional sense. Believe it or not, the actual zoom range of the EF 8-15mm Fisheye on a full-frame body is about 1.03x. So what’s going on?
The easiest way to explain this is to first consider its performance on a full-frame body. At the maximum focal length of 15mm, the lens delivers an angle of view measuring 175.5 degrees on the diagonal. Zoom-out just a fraction to the 14mm mark and you’ll reach the maximum 180 degree diagonal angle of view. This is as wide as the lens ever gets and is known as a full-frame or diagonal fisheye. You’re getting the full 180 degrees on the diagonal, but the rectangular shape of the frame means the edges are cropped, slightly reducing the horizontal and vertical angle of view.
Above: Canon EF 8-15mm on full-frame at 15, 14, 13 and 12mm
Above: Canon EF 8-15mm on full-frame at 11, 10, 9 and 8mm
Zoom-out further and the actual imaging circle itself begins to appear in the corners of the frame, with blackness beyond. This appears at first like vignetting in the corners, but as you steadily zoom-out the shape of the circle is gradually revealed. At about 11mm, the circle touches the horizontal edges of the frame, before the entire circle is revealed at 8mm, surrounded by blackness. This is known as a circular fisheye, but while the image has appeared to zoom-out during the adjustment, it’s important to note it’s still delivering the same 180 degree angle of view as before. The only difference is now you can see the complete 180 degrees in any direction, effectively capturing an entire hemisphere, whereas as 14mm, you only captured 180 degrees on the diagonal. You can clearly see this in the examples above by noting the diagonal coverage remains unchanged between 14 and 8mm.
Above: Canon EF 8-15mm f4 coverage on full-frame, at 8mm (left) and 15mm (right)
Fit the lens on an APS-H (1.3x crop) or APS-C (1.6x crop) body and you’ll initially capture a smaller angle of view than a full-frame body, but at around 12mm on the former and 10mm on the latter, the maximum 180 degree diagonal angle of view is achieved, after which it’s just a case of revealing more of the imaging circle and the blackness beyond it. The difference between these cropped sensors and full frame though is you’ll never see the entire circle. With the lens set to its shortest 8mm focal length, an APS-H body will show 180 degrees diagonally and horizontally, but the vertical side is cropped a little. On an APS-C body, it’s tighter still and you won’t quite achieve 180 degrees horizontally, instead just having black corners to the image.
Above: Canon EF 8-15mm f4 coverage on APSC, at 8mm (left) and 15mm (right)
Since most people won’t want to see the imaging circle unless it’s in its entirety, Canon positions markers on the barrel to indicate the maximum coverage on APS-H and APS-C bodies before vignetting begins. There’s also a physical limiter for APS-C bodies which prevents you from zooming wider than 10mm, but sadly owners of APS-H bodies will have to keep an eye on the markings alone. It’s worth remembering most DSLR viewfinders don’t have 100% coverage, so just because you can’t see the vignetting creeping into the corners doesn’t mean it isn’t actually being recorded. Luckily the 10mm limiter keeps APS-C bodies free of vignetting and all APS-H bodies are 1D series with 100% viewfinders; Live View will also show 100% coverage.
You may also be wondering how the coverage on the EF 14mm f2.8L II compares, after all, 14 is wider than 15, right? Well once again be prepared for a surprise as these are quite different optical designs. The EF 14mm f2.8L II may have a 14mm focal length, but it’s an ultra-wide lens with relatively minimal distortion. The diagonal coverage on a full-frame body is 114 degrees.
In contrast, set the EF 8-15mm Fisheye to 14mm on a full-frame body and as described earlier, it’ll deliver a 180 degree view on the diagonal. That’s a considerably bigger field of view than the EF 14mm f2.8L II, and understandably comes with equally considerable distortion. If you like straight lines in your images, this lens is not for you as the barrel distortion transforms anything beyond the very centre of the image into severe curves. You’ll need to carefully position subjects in the middle and ensure the horizon crosses the centre to avoid them being rendered into bananas. Even then, anything approaching the edges will be distorted whether you like it or not.
You also have to be very careful with framing a 180 degree angle of view, because if you point the camera straight forwards, it’ll capture everything from directly above and below, including your feet. It’s easy for your arms to also become visible in the periphery and you often find yourself holding the camera in unusual poses while leaning forward to avoid making an appearance. Point it vertically upwards at 8mm on a full-frame body and you’ll record the entire sky with a 360 degree view of the surrounding horizon. It’s certainly a unique proposition.
Canon EF 8-15mm Fisheye design, build quality and focusing
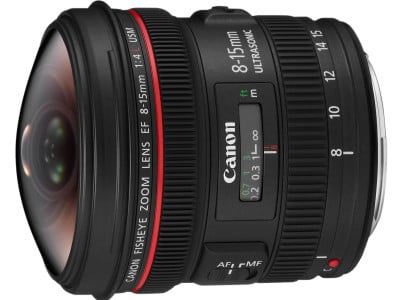
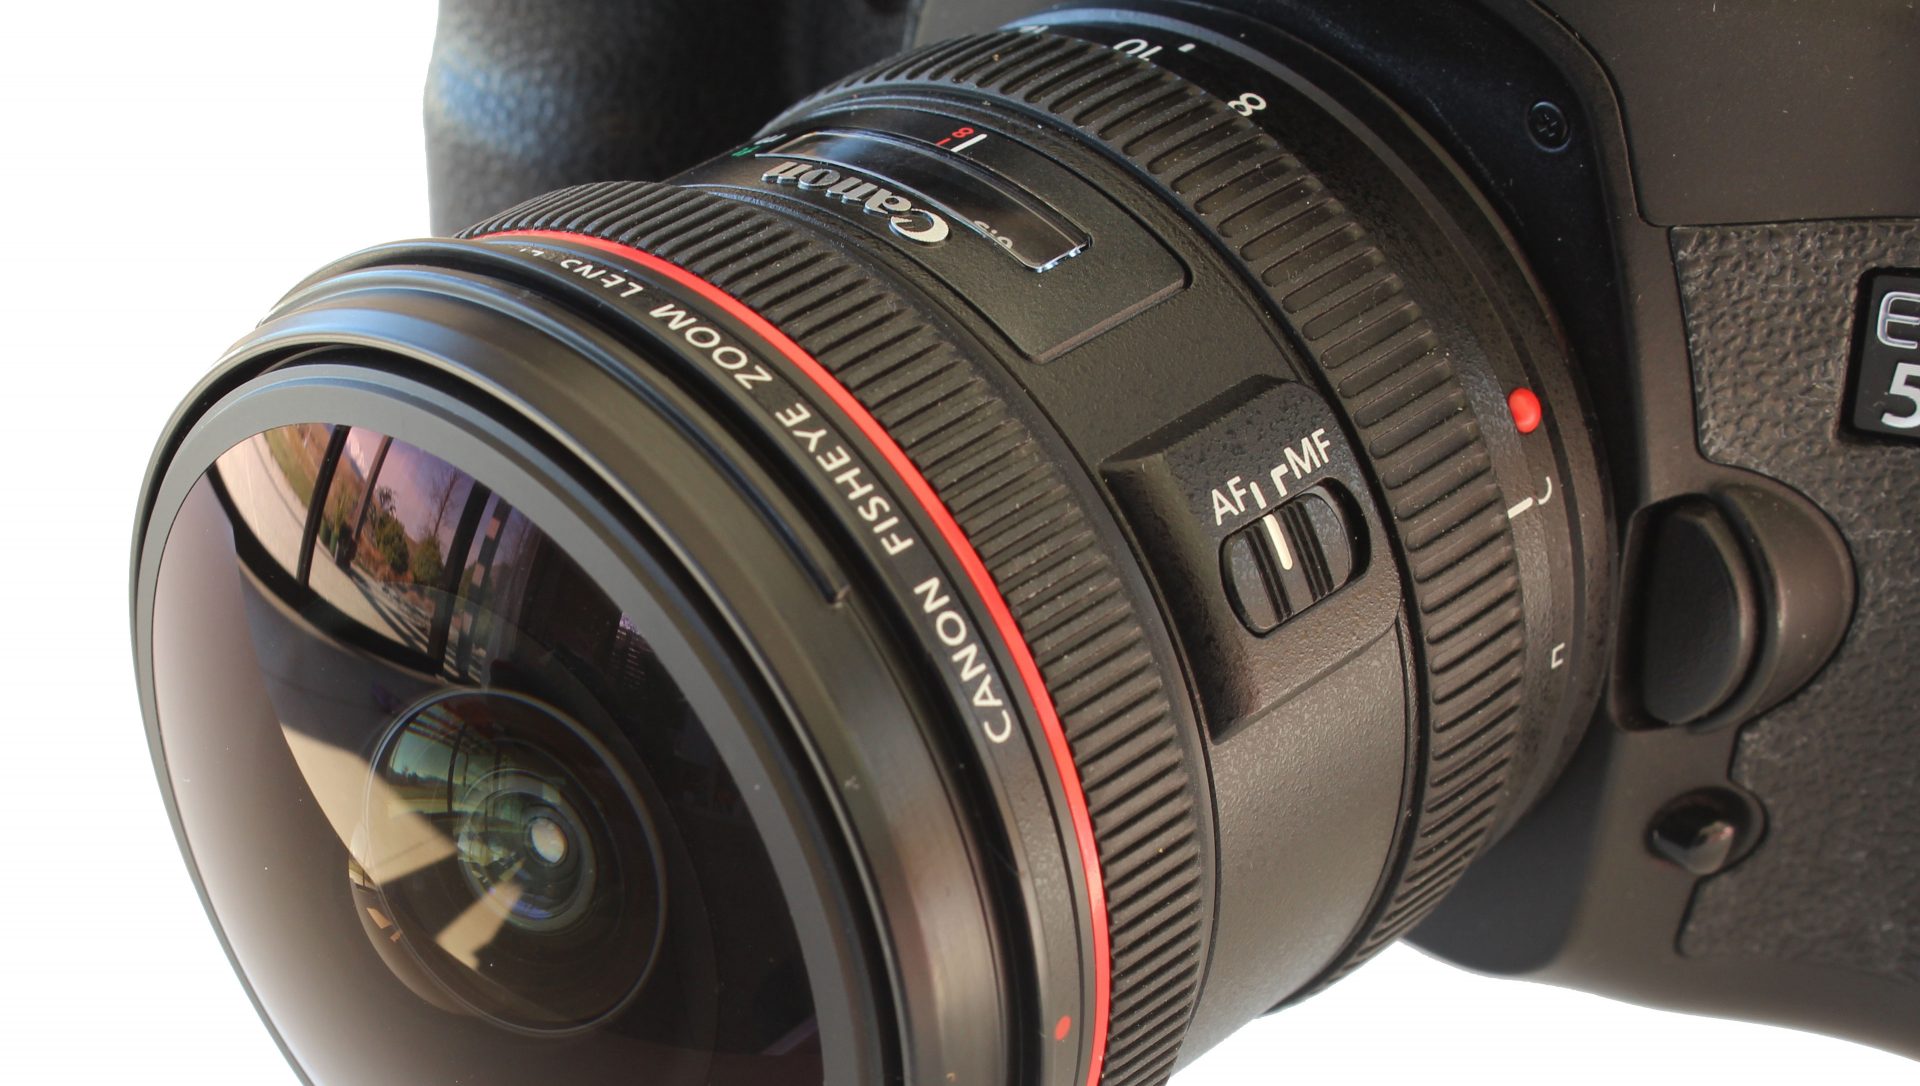
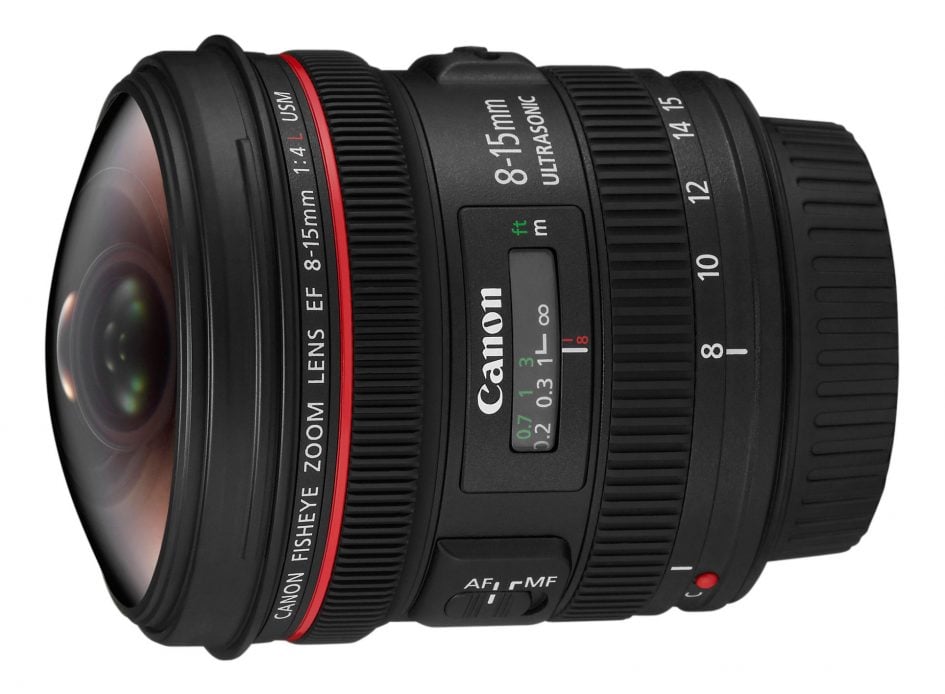
Measuring 83mm in length and 78.5mm in diameter at its widest point, the EF 8-15mm Fisheye is in fact Canon’s smallest lens in its ‘L’ range. It’s noticeably smaller than the EF 16-35mm f2.8L II and EF 17-40mm f4L zooms, and smaller even than several primes including the EF 35mm f1.4L II, EF 24mm f1.4L and EF 14mm f2.8L II.
Weighing 540g it feels reassuringly dense, but never heavy. That’s only 65g more than the lightweight EF 17-40mm f4L and about 100g less than either the EF 16-35mm f2.8L II or EF 14mm f2.8L II. It is understandably a little larger and heavier than the ageing EF 15mm f2.8 Fisheye prime, which measures 73x62mm and weighs 330g, but again carrying the EF 8-15mm never felt like a burden.
The build quality lives up to the ‘L’ range with everything feeling tough and well put-together. The relatively short barrel length leaves little room for both a zoom and manual focusing ring, so each is noticeably narrower than those on, say, the EF 16-35mm f2.8L II and EF 17-40mm f4L. That said, both the zoom and manual focusing rings on the EF 8-15mm are perfectly usable, and like other ‘L’ lenses are both silky smooth in operation.
Sandwiched between the two rings is a focus distance window. It takes about a 90 degree turn of the manual focusing ring to go from one end to the other, and as a USM model it supports full time manual focusing. Autofocus is quiet and swift, taking less than a second to focus throughout the range, although the extreme perspective on the lens means it can sometimes be hard to precisely position an AF point over the desired subject. Then again with an enormous inherent depth-of-field, focusing isn’t your biggest issue with this lens.
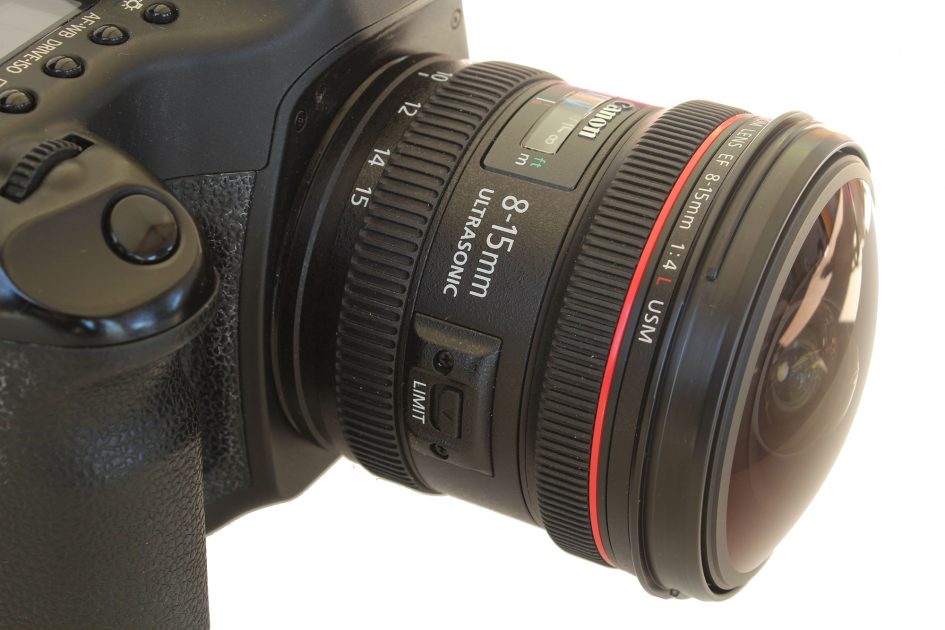
There’s two switches on the barrel, one to choose between Manual Focus and Auto Focus, and the other to set the zoom limit for APS-C cameras. As described earlier, the EF 8-15mm Fisheye begins to vignette at focal lengths below around 10mm on APS-C bodies, so the limiter can be set to prevent you accidentally going beyond this point, thereby avoiding any darkening in the corners.
Canon also provides two guide marks on the barrel to indicate where vignetting will occur on both APS-C and APS-H bodies, so that when you’re adjusting the focal length, you’ll know where to stop to avoid darkening in the corners; these are labelled ‘C’ for APS-C and ‘H’ for APS-H.
Unfortunately owners of APS-H bodies like the 1D series don’t also get a physical limiter though, so there’s nothing to prevent them from zooming beyond and having an image with vignetting. It’s a shame Canon couldn’t implement a three-position limit switch to support both APS-C and APS-H bodies, especially as owners of the latter are more likely to buy this lens. As it stands, APS-C owners get to choose from the limiter or a visual guideline, while APS-H owners have only the latter.
Just staying with the zoom for a moment longer, the front element extends from the barrel by about 2mm at the extremes of the range, dipping back roughly halfway in-between at around 11mm. The focusing is entirely internal.
Moving onto the rear lens mount, the EF 8-15mm Fisheye features a rubber ring for sealing, along with grooves to accommodate slide-in gelatin filters – after all, you won’t be attaching any filters to the front of the lens.
Which brings me to the most striking thing about the EF 8-15mm Fisheye lens: its highly curved front element. This stretches across almost the entire front of the lens barrel, with little border around it. Like other fisheye lenses, it’s also highly convex, peaking about one cm higher in the middle than the edges. It’s an impressive-looking piece of glass, although one which can’t help but look highly vulnerable.
To make cleaning easier, Canon has equipped this front element (along with the rearmost one) with a new water-repellent Flourine coating; indeed I believe it’s the first Canon lens to use it. You’ll certainly want to keep it clean too as any significant marks on the front element will visible in photos or spoil lighting flare elements.
I’m pleased to report the new coating seems to work well. I shot with the EF 8-15mm Fisheye mounted on a 1D Mark IV body during a Slope-style Ski contest and regularly found myself and the equipment sprayed by snow. Thankfully neither the lens nor body flinched and water droplets on the front element either ran-off or were easily wiped-off, leaving a clean, unmarked surface. Similarly after shooting dusty mountain biking, a quick squirt with a blower brush and a gentle wipe-down brought the lens back to looking brand new.
Of course dust and moisture are one thing; scratches are another entirely. Canon supplies the EF 8-15mm Fisheye with a substantial plastic lens cap which clips onto the outer rim of the lens hood. Both are fairly unusual, so I’ll spend a little time describing them.
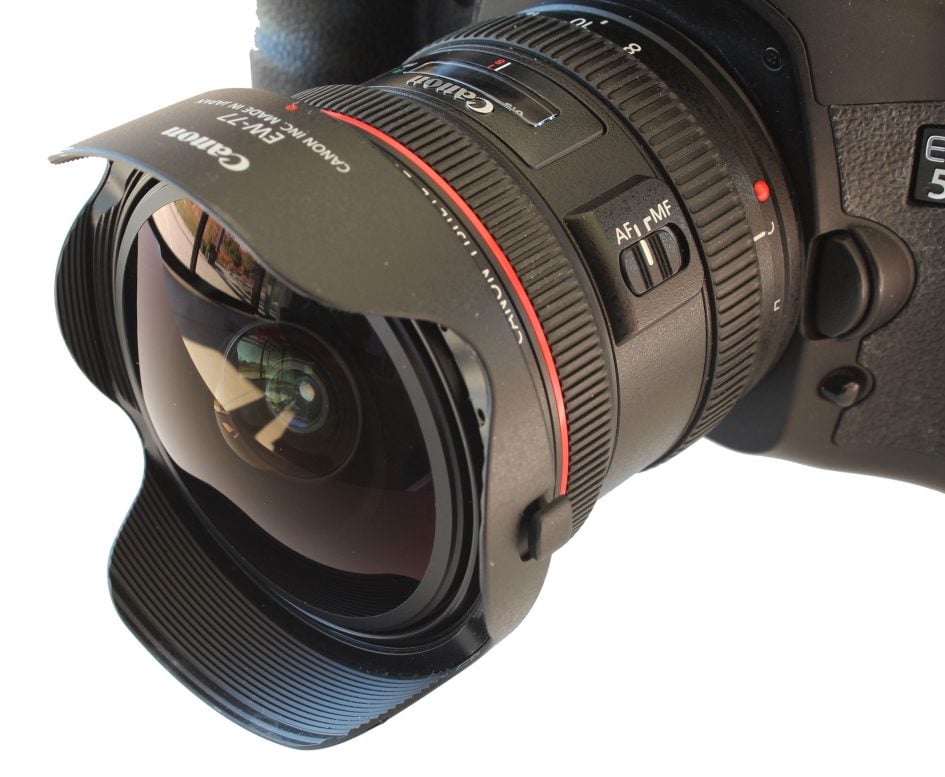
I’ll start with the lens hood, a thin petal design, which clips into place and requires a push of a button to turn and release; this is a quick but secure design, which is necessary as you may find yourself taking it on and off fairly frequently. When mounted on a full-frame body, the periphery of the lens hood actually begins to appear in the frame at around 13mm and quickly becomes obtrusive as you zoom further out. As such you’ll only really want to use it on a full-frame body at the longest focal lengths. Switch to an APS-C cropped body though and you’ll be able to use it throughout the entire range.
The lens hood can also be used to stand the lens face down on a flat surface with little fear of toppling over, but obviously for full protection you’ll want to fit the lens cap. This actually grips the edges of the top and bottom petals on the lens hood and requires a pinch to release. Unfortunately this pinch doesn’t have to be particularly significant, and a light brushing of the buttons will see the cap fall off. This is of concern when the lens is in a bag, especially one which holds the lens tightly to prevent it from wobbling around. When pulling the lens from a bag, the cap regularly stays behind, and there’s definitely a worry it may also come loose during transit, leaving the front element exposed and vulnerable to scratches. I’d suggest transporting the lens in a fitted pouch to prevent the cap from falling off, or at a push, you could even use elastic bands. Either way it’s not ideal, and a little disappointing after the solid and secure lens hood.
That said, three of us took a lot of photos with this lens under some pretty demanding conditions, snow or dust everywhere, whipping it in and out of bags, and while we were all fairly cautious, the lens still looked brand new at the end of it. You don’t really want to put this to the test, but it may be a lot tougher than it looks. Time and anecdotal evidence will tell.
As a quick postscript, it’s important to note while the EF 8-15mm Fisheye does have a large and convex front element, it’s nowhere in the same league as the Nikkor 14-24mm f2.8 which measures 98mm in diameter, 132mm in length, features a huge built-in lens hood and weighs almost double at 970g.
Now the physical report is complete, it’s time to see how it performs in practice. As promised, I have field-reports from three photographers:Gordon Laing, Scott Kennedy, Scott Kennedy and Stefan Haworth.
Canon EF 8-15mm Fisheye field report: Gordon Laing
As a self-confessed fanatic of wide-angle and scientific photography I was understandably very excited to get my hands on the Canon EF 8-15mm Fisheye – and it certainly didn’t disappoint. Within five minutes of receiving the lens and mounting it on multiple bodies I insisted my photography friends meet up immediately to check it out.
We giggled like kids as we tried different compositions with the 180 degree coverage. That’s the thing about extreme wide angle lenses: they’re a lot of fun, and you can’t help but smile when you’re using the EF 8-15mm Fisheye.
Positive first impressions? The lens was surprisingly small, but reassuringly solid, the focusing and zoom rings felt silky smooth, and it really did capture an enormous field of view whether mounted on full-frame or cropped bodies. Did I mention it was fun? Big time.
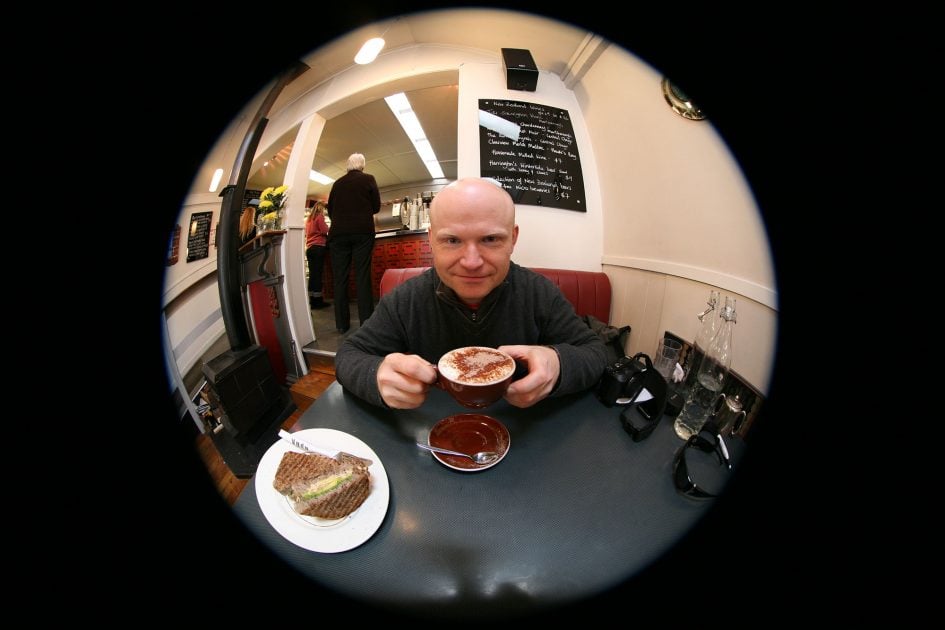
Circular Fisheye on EOS 5D: Aperture Priority, 1/25, f4, 800 ISO, 8-15mm at 8mm
The photo above was taken by Scott Kennedy in Queenstown’s Vudu cafe using a full-frame Canon EOS 5D body. This is with the lens at its shortest 8mm focal length where it delivers a full circular fisheye image (only possible when mounted on full-frame bodies). In order to squeeze a 180 degree angle of view into the frame, a fisheye lens suffers a lot of distortion and that’s clearly apparent towards the edges of the frame where straight lines are rendered into highly curved bananas. Subjects in the middle can get away with minimal distortion, but you have to keep your distance. This was taken from a couple of feet away and already my face has become quite rounded. It’s not exactly a flattering portrait lens, although again if you stay a little more distant you can achieve more natural-looking results.
So once again this lens is fun, but any immediate concerns? The highly curved front element looked extremely vulnerable, especially as the lens cap had an unnerving habit of coming loose with the lightest touch. The greatest concern though was whether the initial novelty would quickly fade. After all, unlike normal wide angle lenses, the distortion from a fisheye is extreme, unnatural and instantly recognisable.
After my Doctor Evil casting session in the cafe I headed out to grab some snapshots around Queenstown with a full-frame EOS 5D. One of the challenges with this lens is finding a subject to fill the frame. It makes everything look so small you need to get really close for a large reproduction on the frame. Luckily the EF 8-15mm has an extremely close minimum focusing distance of about one inch from the front element, and believe me, you’ll regularly push it to this limit.
This in turn does however have some side-effects. First is at extremely close range very small adjustments in your position can have a major effect on the composition. Secondly I’d recommend keeping both eyes open as when you’re composing with one closed you’ll be blissfully unaware of how close you’re actually getting to some subjects; glance up and you may be surprised to discover that precious front element virtually touching your subject and passers-by giving you some very strange looks.
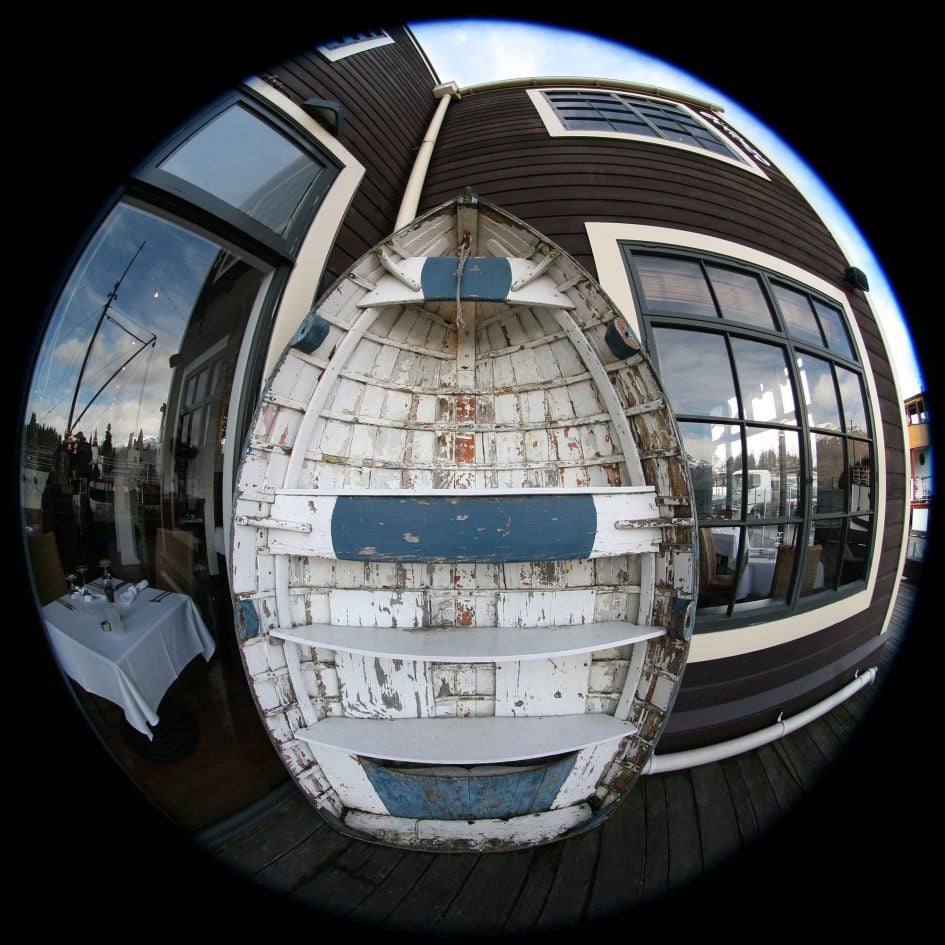
Circular Fisheye on EOS 5D: Aperture Priority, 1/60, f8, 100 ISO, 8-15mm at 8mm
This photo of a rowing boat outside Queenstown’s Wai restaurant looked like the ideal subject for a circular fisheye photo, but it proved resistant to a perfectly symmetrical composition. Even with the architectural grid focusing screen fitted to the EOS 5D I couldn’t quite get everything straight. I thought handholding the EF 8-15mm Fisheye would be the way forward, but for precision symmetry, you’ll really want a tripod and some patience. While repositioning myself, I also found my arms and feet creeping into the periphery of the image. This is the risk of a lens with 180 degree coverage and something you have to keep an eye out for. To avoid it you’ll need to adopt even more contorted poses at times.
Above: Download the original file (Registered members of Vimeo only).
As the Steamship Earnslaw approached, I switched the lens to an EOS 600D / T3i cropped-frame body and zoomed-it as wide as it would go before vignetting creeped-into the frame. The lens actually has a guide mark and zoom limiter switch to prevent you from recording any vignetting on an APS-C body, but since 16:9 video is effectively cropped a little further than 3:2 photos, you can actually zoom a bit wider while still avoiding dark corners from appearing on the frame.
Three things I noticed while filming this video: first, the lens is extremely wide and could capture the entire boat even when it was almost touching the dock; second, the lens doesn’t have Image Stabilisation and while that’s not an issue for photos at these extremely short focal lengths, you can still see wobbling on video if you’re not steady; and third, as many car wing mirrors warn, objects are closer than they appear. As the lifeboat grew ever-larger on the screen I glanced up to find it almost clobbering me.
One of the more interesting aspects of the lens is how it’s not really a zoom at all, at least in the traditional sense. On a full-frame body, there’s a tiny widening of the coverage between 15 and 14mm, but once you’re at 14mm, you’re already recording 180 degrees on the diagonal, and the lens never actually gets any wider. Reducing the focal length simply reveals more of the imaging circle and the blackness beyond, gradually revealing 180 degrees on the horizontal axis and finally on the vertical for a complete circular hemisphere.
Above: Canon EF 8-15mm coverage on full-frame
To illustrate this I headed over to Queenstown’s Dux de Lux bar and took two photos from the same spot with a full-frame body: one at 15mm and the other at 8mm, both pictured above. The 8mm version looks much wider at first glance, but check out the diagonal coverage on the 15mm version and you’ll see it’s capturing virtually the same field of view as the diagonal on the circular image. If the first sample had been taken at 14mm, the diagonal coverage would have been identical. You can see another example of this in the Sample Images Gallery page of snowboards in R&R Sport.
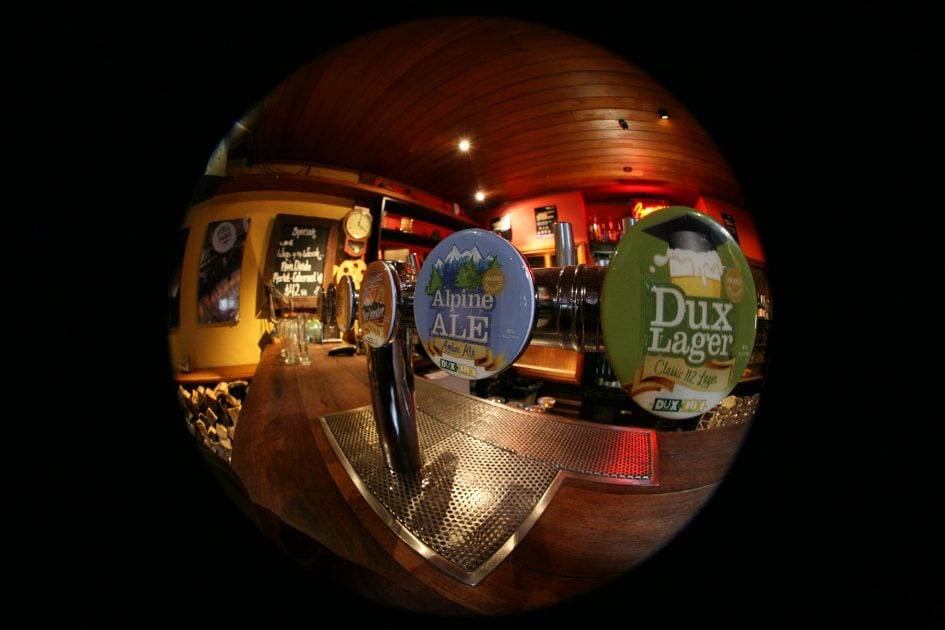
Circular Fisheye on EOS 5D: Aperture Priority, 1/8, f5.6, 800 ISO, 8-15mm at 8mm
While in the bar I thought I’d check out the macro capabilities on the beer taps. I wanted the Alpine Ale badge to be in the middle of the frame, so approached as close as I could without the badge to the right getting in the way. I shot this at both f4 and f5.6, but preferred the latter, which is shown above. While this lens does offer an enormous depth of field, you can still have slightly blurred backgrounds if you open the aperture and get really close to your subject, as seen here. But if you back off more than a couple of feet, pretty much everything will be sharp even at large apertures.
After returning home and analysing my first day’s results, I realised I’d gone almost exclusively for the novelty shots to illustrate the extreme nature of the lens. It’s hard not to on your first day with this lens, but while they were fun to take and look at, there was nothing which truly leapt out and grabbed me as a keeper. Most were too distorted or extreme-looking in the wrong way. Fun yes, but usable for anything other than an illustration? Perhaps not. I did however have high hopes for day two as I’d be attending an event a lens like this was designed for.
Extreme lens for extreme sports
Ultra-wide and fisheye lenses are ideal for capturing extreme action sports like Skiing, Snowboarding, Skateboarding and Mountain Biking. They allow you to get really close to the action, their inherently large coverage and depth-of-field is forgiving on both composition and focusing, while their distorted geometry can actually enhance the image. They can also be used to render even a nearby athlete into a small figure, dwarfed by the landscape around them.
Living in Queenstown, New Zealand, there’s no shortage of extreme sports to photograph but I was particularly pleased the lens arrived while there was still some snow on the mountains and winter events taking place. I opted to shoot the Slope Style final at the 2011 North Face Free Ski Open at Snow Park, just 45 minutes from Queenstown. I headed over there with fellow photographers Stefan Haworth and Scott Kennedy, who also had a chance to try out the lens, and who’s views you’ll find elsewhere in this review. To do the event justice I borrowed a Canon EOS 1D Mark IV pro sports DSLR from my friend Blair Pattinson.
The EF 8-15mm Fisheye is big news for owners of the EOS 1D Mark IV, not to mention previous versions, which all employ an APS-H sensor with a 1.3x crop. Previously there was no option for these cameras to deliver a 180 degree diagonal fisheye image; they either had to crop the field of view from a fisheye designed for a full-frame body, or work around either the physical or optical incompatibility of a lens designed for the smaller APS-C format. Neither solution was ideal, which is a shame since the 1D series is the most appropriate camera for shooting extreme sports thanks to its speed and toughness. APS-H bodies are crying out for a weather-sealed fisheye lens, and now they have one which again has the added benefit of delivering a 180 degree diagonal fisheye image to Canon’s other two sensor formats.
At first I was fairly cautious, shooting at a distance from the sidelines, but before long I repositioned myself directly under a jump, with my back pressed up against the wall and skiers sailing overhead. This is where the EF 8-15mm Fisheye really performed.
The wonderful thing about having 180 degree coverage is there’s little chance of missing the action. By angling the lens at about 45 degrees, I was able to capture everything from the lip of the jump to the landing area far beyond. There was nowhere the skier could go that would have them skipping the frame. The huge depth-of-field also meant focusing was a non-issue, so I simply locked it at a few meters distant. Even better, the completely blue sky meant the exposures during the event remained consistent, so I locked that down too in Manual. Basically all I had to do was wait until I heard a skier hit the jump then keep my finger held on the shutter release button until they landed.
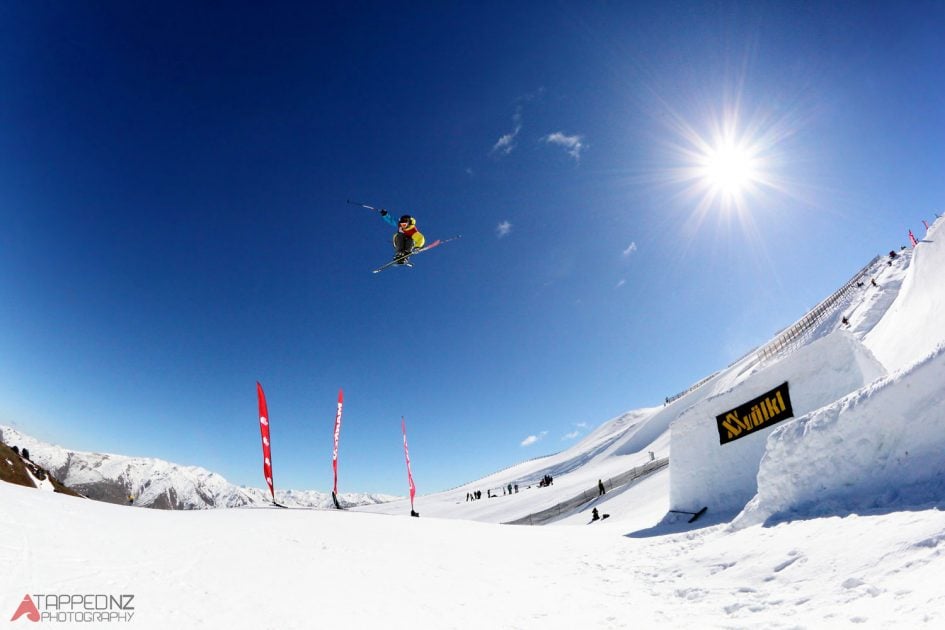
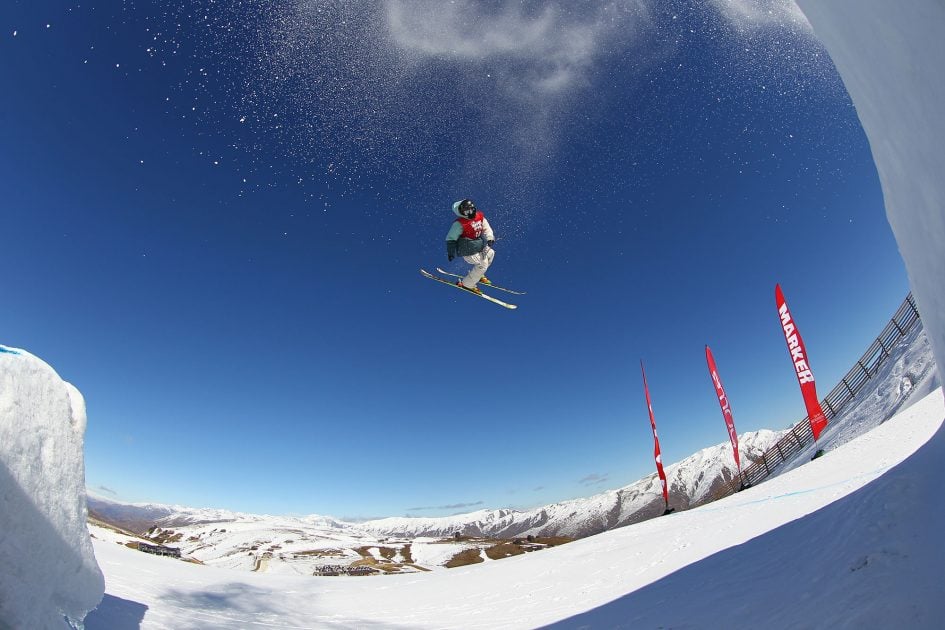
Full-frame Fisheye on EOS 1D Mark IV: Manual, 1/1600, f7.1, 200 ISO, 8-15mm at 12mm
The photo above was one of my first, taken with the lens set to 12mm: the focal length which delivers a 180 degree diagonal on an APS-H sensor and avoids any vignetting. There’s a lot of distortion which has made the straight jump look almost like a curved halfpipe, but the snowy landscape is very forgiving with geometric stretching. I’m no sports photographer but was really pleased with this result.
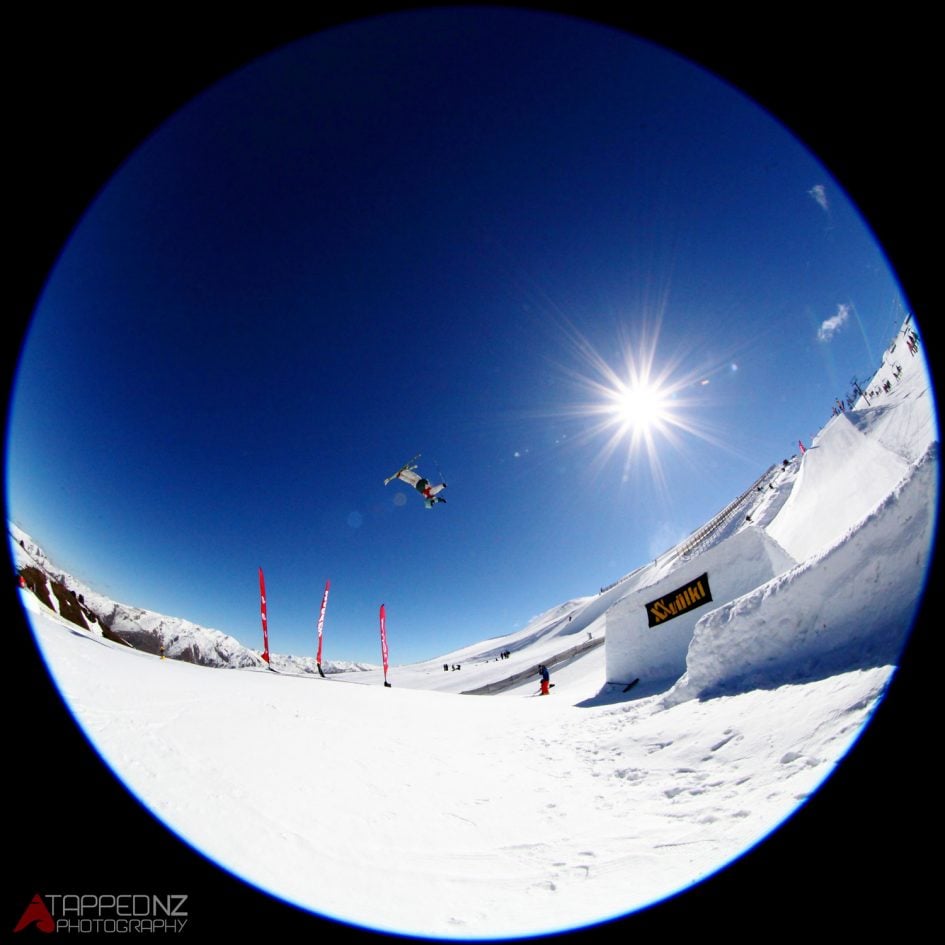
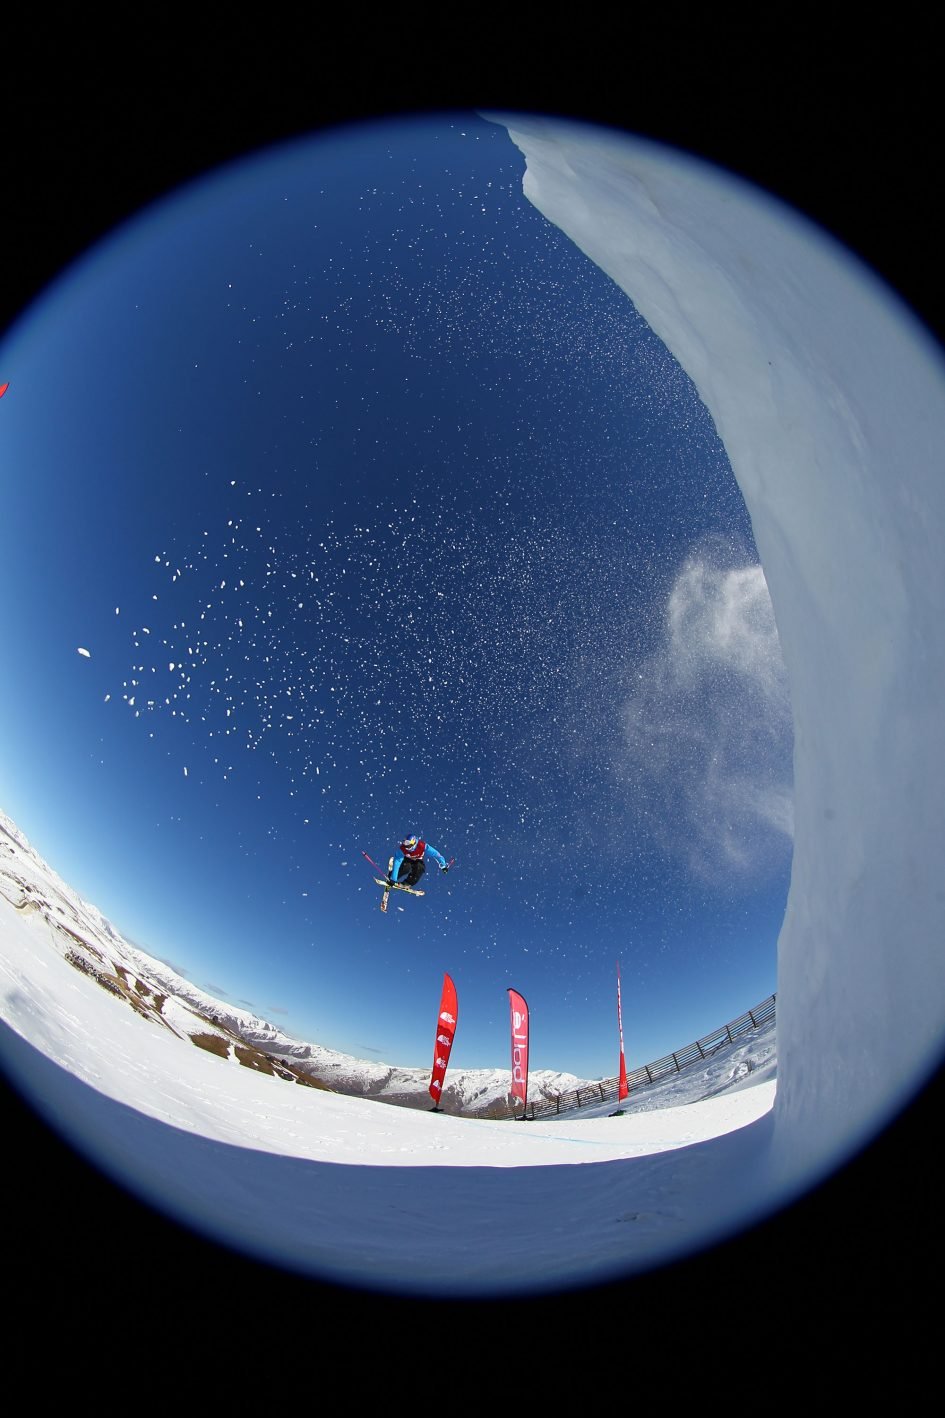
Partial Circular Fisheye on EOS 1D Mark IV: Manual, 1/1600, f7.1, 200 ISO, 8-15mm at 8mm
Later I tried zooming all the way out to 8mm from the same position. As explained in the main review, this gradually reveals more of the imaging circle and the blackness beyond, but the 1.3x crop of the APS-H sensor means you’ll slice off the sides. Normally this would be an undesirable result, but there’s something I quite like about this shot which I’m not sure would be enhanced by it being enclosed within a full circle. There’s a look of a snow globe here with the snow spraying from the lip of the jump which I’m really pleased with.
But again this was one of the easiest shots I’ve ever taken. The vast coverage and depth of field of this lens coupled with the machine-gun speed of the 1D Mark IV made it almost impossible to go wrong. It was a really fun combination to use.
What’s not obvious in these photos though is the proximity of the skiers and the top of the jump which was literally only a few feet above my head. It was a highly visceral experience which saw me sprayed with snow after every jump. On more than one occasion both the 1D Mark IV and EF 8-15mm appeared more white than black with snow. I wasn’t worried about the body as the 1D Mark IV has a terrific reputation for toughness, but I did wonder how the lens would cope, especially with its highly curved and vulnerable front element.
The answer was very well indeed. The snow quickly melted into water droplets which literally ran-off the glass thanks to its new Fluorine coating. Anything remaining was easily wiped-off, leaving the lens looking brand new. My first impression of the lens was concern over this front element, but the more I used the lens, the tougher it felt. This really was a real trial by fire – or at least snow and ice – and the EF 8-15mm Fisheye came through with flying colours.
But can it ever look natural?
Having shot some deliberately extreme images with the lens I decided I should now see if it could deliver more natural-looking results. The biggest issue is of course the distorted geometry, which renders any straight lines into banana-like curves, especially towards the periphery of the image. There’s little you can do to hide this with buildings, while horizon lines, whether natural or man-made, can look terrible when positioned anywhere other than the centre of the image.
For a half-natural result then, you need to be very careful with your choice and position of subject. Place familiar or recognisable subjects in the very middle for the least distortion and ensure the horizon crosses the absolute centre to avoid bending. As for the edges of the frame, many organic objects can mask the distortion pretty convincingly, such as carefully-positioned tree branches, rocks or mounds of snow. If the viewer doesn’t know how these should look in reality, they won’t know if they’ve become a little stretched.
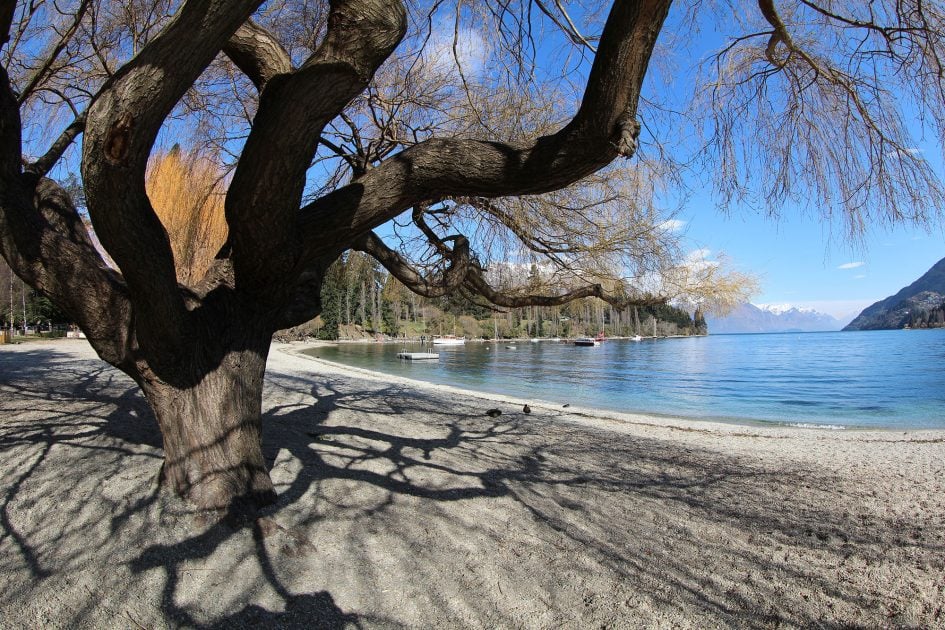
Full-frame Fisheye on EOS 600D / T3i: Aperture Priority, 1/250, f8, 100 ISO, 8-15mm at 10mm
Probably my most successful example of putting this into practice is above, taken from the beach in Queenstown. It’s a familiar view to regulars at Cameralabs as I use it in many of my review galleries, so check a few of them out if you’d like to see how it looks with a ‘normal’ wide angle lens. Here I was very close to the tree in the foreground, but the already bendy branches were very forgiving with the lens distortion. The worst thing was the horizon which needed to be dead-centre to avoid severe bending. This in turn meant the base of the tree was higher in the frame than I really wanted, but the result is still fairly natural-looking. The photo is also an example of the lens mounted on a cropped-frame APS-C camera, in this case an EOS 600D / Rebel T3i. The lens was zoomed-out to 10mm, where it delivers a 180 degree diagonal on this format, while avoiding vignetting in the corners.
Big sky and solar flare
When shooting with a fisheye lens it’s hard to avoid the Sun in your images, so why not embrace it instead? By closing the aperture down to between f11 and f22, most wide angle lenses can render the Sun into an attractive star-burst.
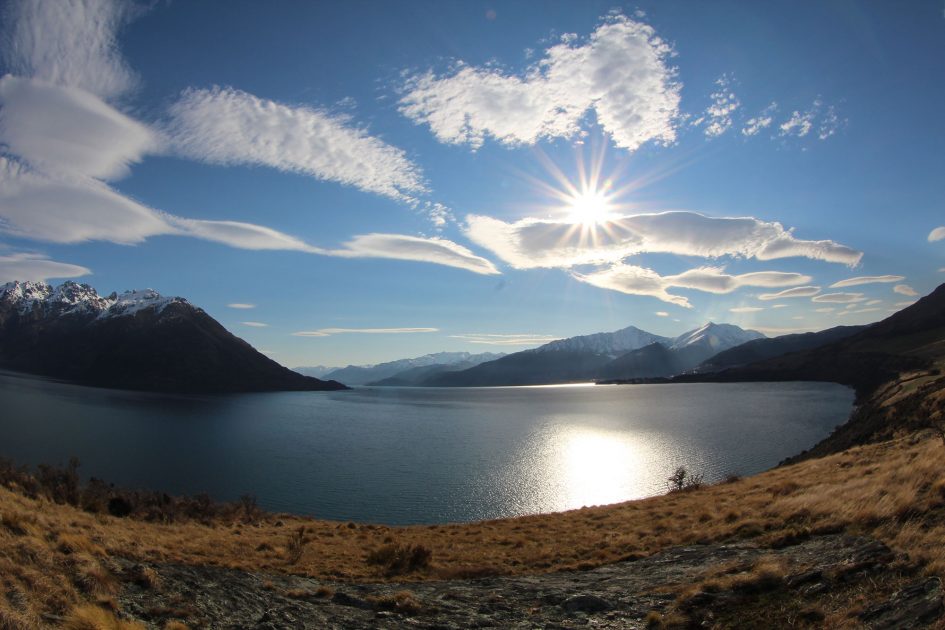
Full-frame Fisheye on EOS 600D / T3i: Aperture Priority, 1/100, f22, 100 ISO, 8-15mm at 10mm
The photo above was taken with an EOS 600D / T3i and the lens again set to 10mm for the maximum 180 degree diagonal while avoiding vignetting. I’m directly facing the Sun and managed to grab it just before it hid behind the clouds – the star-burst effect doesn’t work well unless it’s completely clear. The downside to using small apertures is some softening of fine detail due to diffraction, but it’s a nice effect to have at times when the Sun is co-operating. As with the earlier example, I had to position the horizon close to the center line to avoid unnatural-looking distortion.
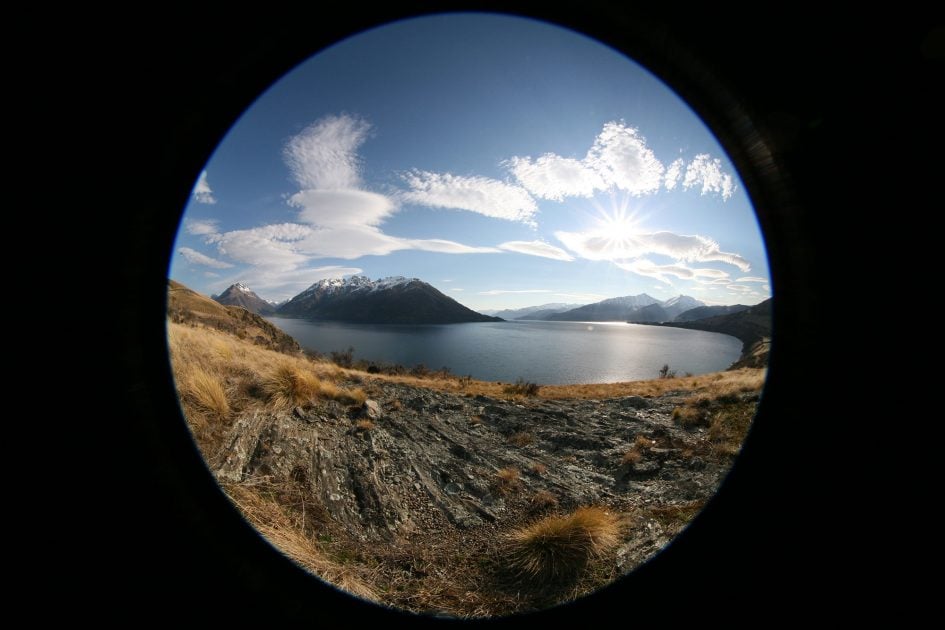
Circular Fisheye on EOS 5D: Aperture Priority, 1/50, f22, 100 ISO, 8-15mm at 8mm
For the sake of completeness, here’s a similar shot taken moments later from virtually the same spot with the lens mounted on a full-frame EOS 5D and zoomed-out to 8mm for the full circular fisheye image. As you can see, the coverage across the diagonal is virtually the same as the first version, except now the 180 degree coverage is the same in every direction – and of course it’s within a circle. The question is, which do you prefer?
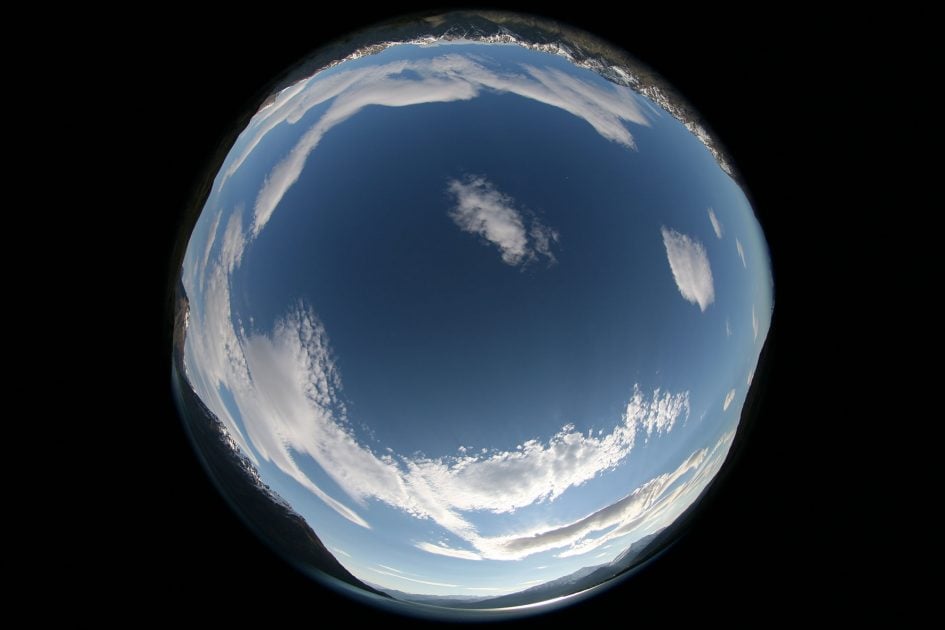
My final image illustrates what fisheye lenses were originally designed for: capturing the entire sky in a single shot for meteorology applications. To do this on the 8-15mm, you’ll need to mount it on a full-frame body, zoom-out to 8mm, and simply point it straight upwards, carefully adjusting the angle if handheld so not to crop any areas. The result is a full hemisphere capture.
Circular Fisheye on EOS 5D: Aperture Priority, 1/500, f8, 100 ISO, 8-15mm at 8mm
Here’s one I took moments after the last couple. The Sun had since hidden itself behind a cloudbank, but this in turn meant it would no longer be the focus of the composition. Instead it’s all about the clouds, with Queenstown’s surrounding mountains making an interesting circumference.
While framing the shot, I noticed two of the big clouds looked a bit like eyes on a face, so I rotated the camera to reposition them, with a larger distorted cloud towards the bottom curving into a smile. I’m pleased with this shot, and certainly if you’re into clouds, it’s a great lens to have in your arsenal.
Sadly weather conditions conspired against me grabbing a full-sky sunset / sunrise during my test period with the lens, while the presence of the Moon spoilt any astro-photography opportunities. I do plan on getting the lens back in again for additional tests in the near future though, so will try and grab these images to complete my set here.
Overall thoughts
I’ll leave my formal opinion for the verdict page, but just briefly here wanted to conclude by saying the EF 8-15mm Fisheye proved to be less of a novelty over time than I expected. Sure it’s still best-suited to specialist and extreme photography, but if you’re into action sports, skies and clouds or simply huge subjects, it can prove surprisingly versatile.
Equally I was surprised to find it tougher than it looks, which in some part makes up for that loose lens cap. I can’t say how impervious it is to scratches, but it dealt with snow, water droplets and dust just fine.
Ultimately it was a lot more flexible than I expected, and always lots of fun. I felt like a kid or a mad scientist most of the time with the lens, which does wonders for your mood and compositions. In short I liked it a lot, and while the extreme distortion would rule it out for much of my wide-angle subjects like recognisable landscapes and architecture, I could really see myself using this lens on a fairly regular basis.
Canon EF 8-15mm Fisheye field report: Scott Kennedy
About Scott Kennedy: Scott Kennedy is a freelance Photographer, Filmmaker and Writer based in Queenstown, New Zealand. For the past decade his work has appeared in publications all around the world including Outside Magazine, Lonely Planet, Powder, Bike, New Zealand Mountain Biker, The Climber and The NZ Alpine Journal among others.
From the outset my style of photography most easily fits into the latter category. Primarily I’m an action sports photographer. I shoot a lot of mountain biking, rock climbing and skiing. I also shoot a lot of ‘travel’ photography where the ultra-wide is a handy lens to have to capture an entire scene in one shot.
What I don’t do a lot of is portraits and studio work – two instances where this lens wouldn’t excel, except for shooters looking to have a more artistic look to their shots. For those reasons this lens – or at least the specs of it – are well suited to what I like to shoot.
First impressions:
My first impressions were universally positive. I mounted it on my Canon EOS 7D and used that body for the duration of testing. The lens felt well balanced on the front of the camera with the zoom and focus control a comfortable fit in my hand. The lens has enough weight too feel solid, yet not so heavy that shooting is cumbersome, tiring or uncomfortable.
My initial concern was for the safety of the front element. In the rough and tumble world of action sport photography the convex front element of the lens is just asking to be damaged. Though the asymmetrical lens hood offers some protection, I would live in fear of damaging this lens in some situations.
For example – rock climbing photography. I can imagine having the camera slung over my shoulder as I get myself in position to shoot, and the front element scraping across the rock face. Just the thought makes me shudder. You’d have to be extra careful with this lens if it was going to live on your camera for any length of time.
There are also some concerns that the lens cap doesn’t have great holding power. I thought it did a satisfactory job while I was testing the lens, though I wasn’t switching it out or pulling it out of a full camera bag too much.
The build seemed robust and sturdy. Knowing the lens is weatherproof was a nice assurance, especially considering how close you have to get to your subjects. When shooting mountain biking I was constantly getting sprayed with mud and dust, so the weatherproofing was good peace of mind.
Shooting performance
I was overall very impressed with the shooting performance in the field. When given the option I chose to shoot with the lens zoomed to 10mm as my widest angle. On the APS-C cropped frame of the 7D this was the widest I could get without vignetting appearing in the corners.
With a full frame body it’s possible to get a full circle fisheye, which may appeal to some. My preference to avoid any vignetting was two fold. First personal preference of the final aesthetic of the images and second a more pragmatic commercial outlook. I know if I send a full circular fisheye photo or even an image with significant vignetting to one of the publications I work with they will either crop it so that it has straight edges, or more likely regard it as a novelty shot and reject it. As a pro, regardless of what I think about the aesthetic attributes of a full fisheye shot, if it doesn’t put steaks in the freezer, why am I shooting it?
With my preference for zooming to a minimum of 10mm the limiter switch was a handy feature. Flicking this on allowed me to zoom in and out without having to worry about vignetting creeping unexpectedly into my images. I could get half a mm or so more by flicking off the limiter, but in the end it was just easier to just keep it on.
Overall it’s a very easy lens to use. With such a massive depth of field focussing is astonishingly easy and with a field of view so large, catching the action is a breeze. You hardly need to look through the viewfinder, just vaguely point the camera in the direction of the subject and it’ll be on the frame somewhere.
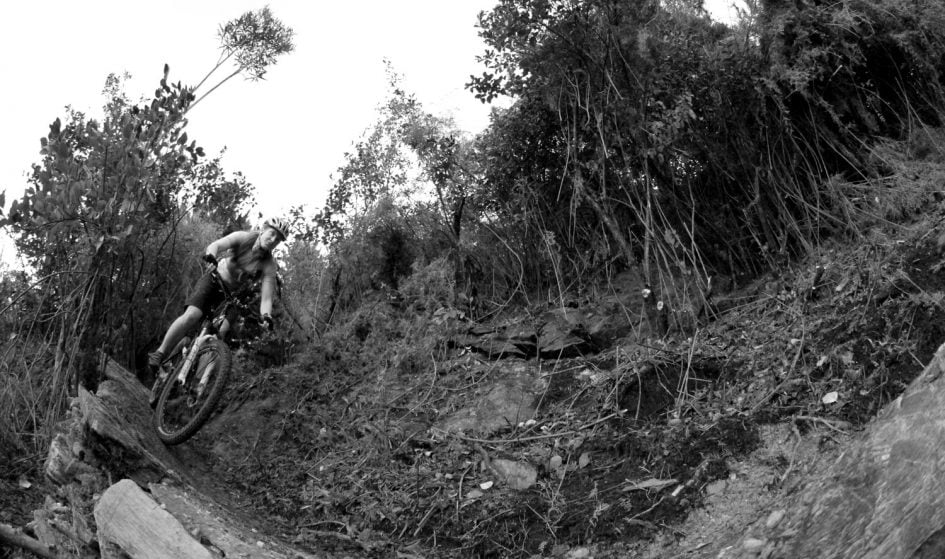
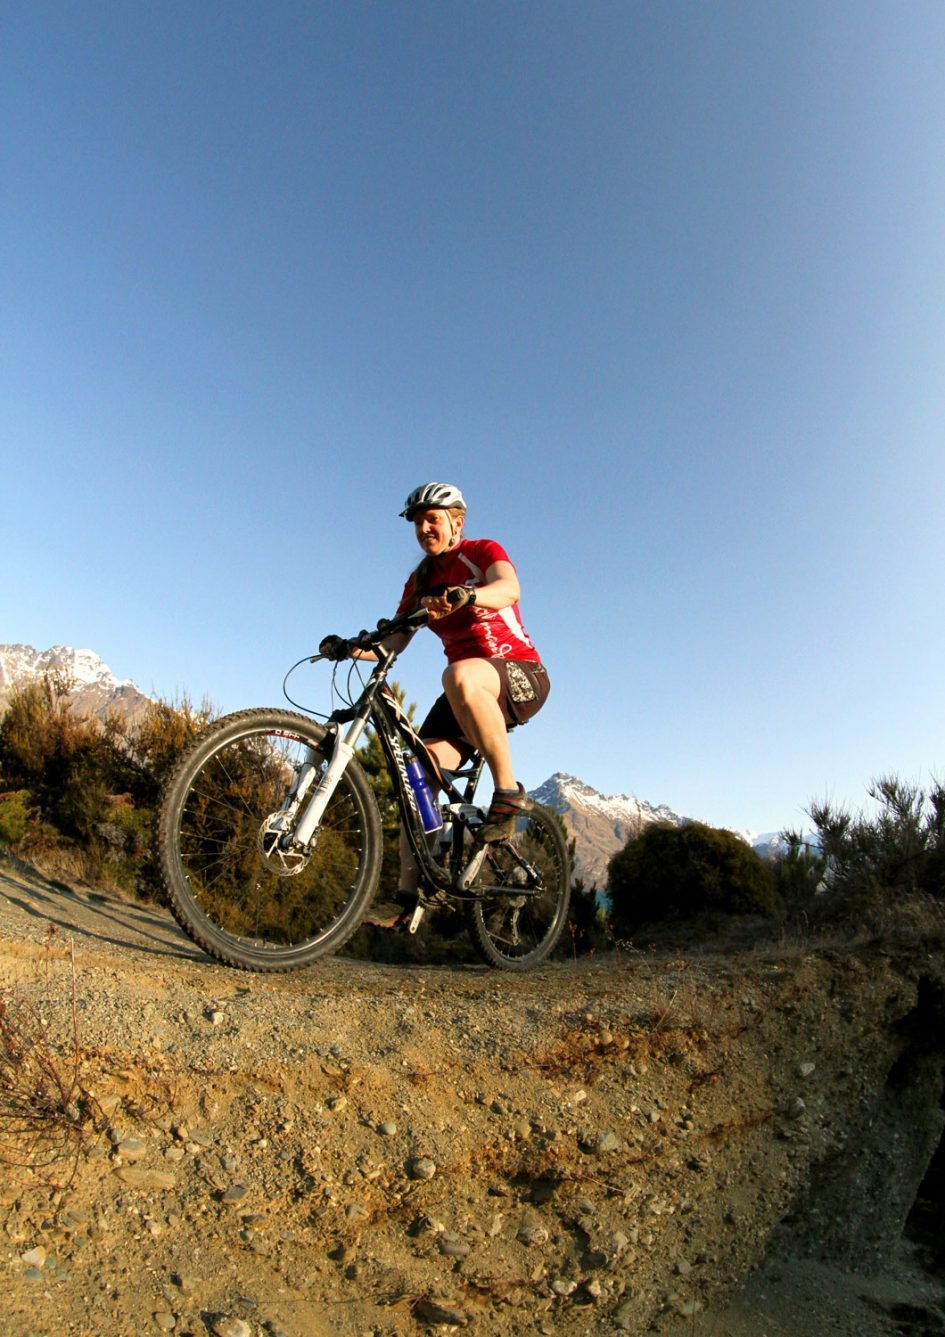
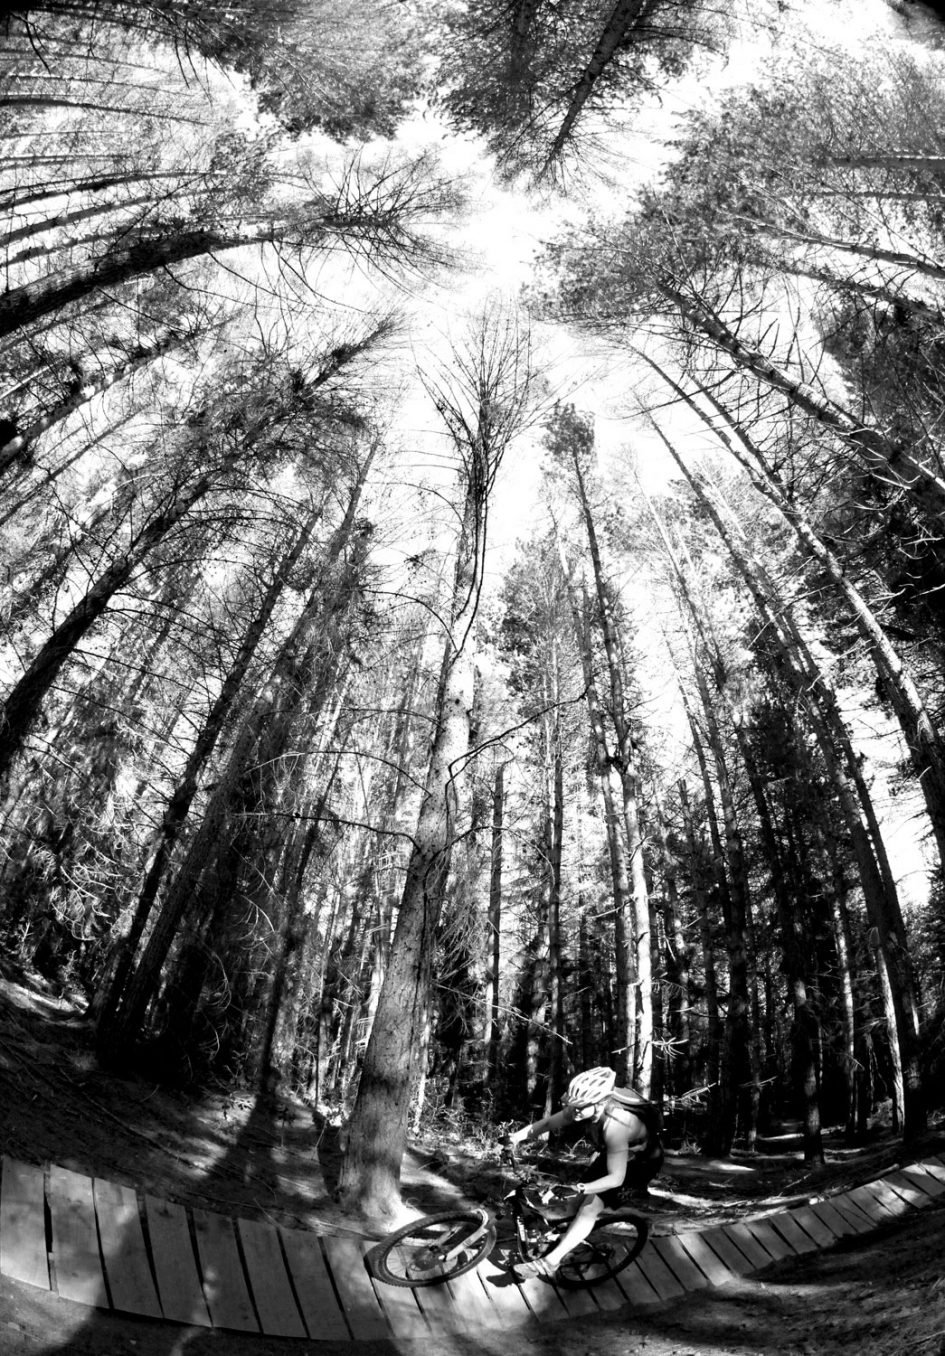
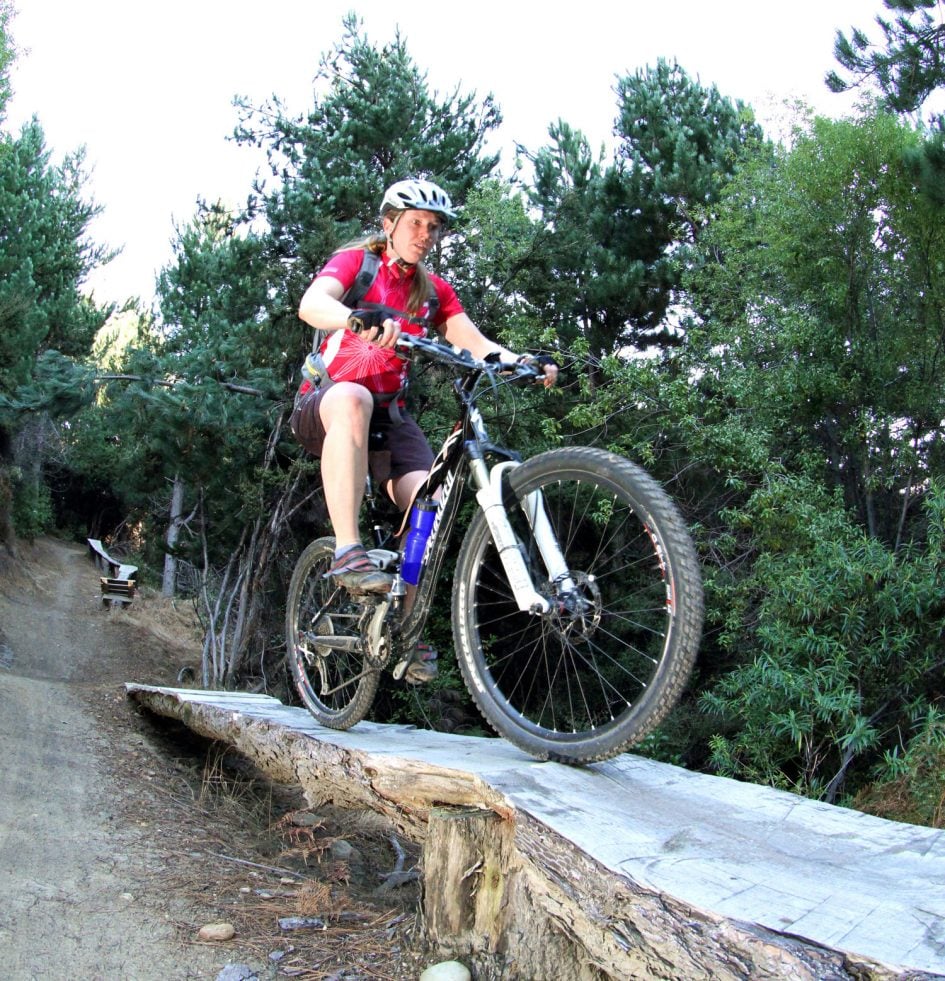
In practical terms framing shots is a different experience for photographers not used to such a wide angle lens. In order to fill the frame with your subject you have to be frighteningly close. While shooting mountain biking with the lens I was positioned on the trail maybe a foot or two from the riders. This close proximity was somewhat intimidating for my subjects and until they got used to me being ‘that’ close it was somewhat off-putting.
Full-frame Fisheye on EOS 7D: Manual, 1/250, f6.3, 2000 ISO, 8-15mm at 10mm
The photo above is a good example of that – this was shot about a foot from the subject as she was riding across that log. You can tell she isn’t that thrilled that I’m that close to her as she’s riding a technically challenging part of the track!
In contrast to that, taking in the entire scene was a breeze – however that includes the sun, your shadow, your camera bag and so on. Careful inspection of the frame before pulling the trigger is essential.
The large field of view also had implications on the exposure. While shooting in mixed light or perpendicular to the light source, the range of exposure within the frame can be enormous. If you’re not shooting in RAW or aren’t keen on extensive post production work, careful composition and exposure attention is required.
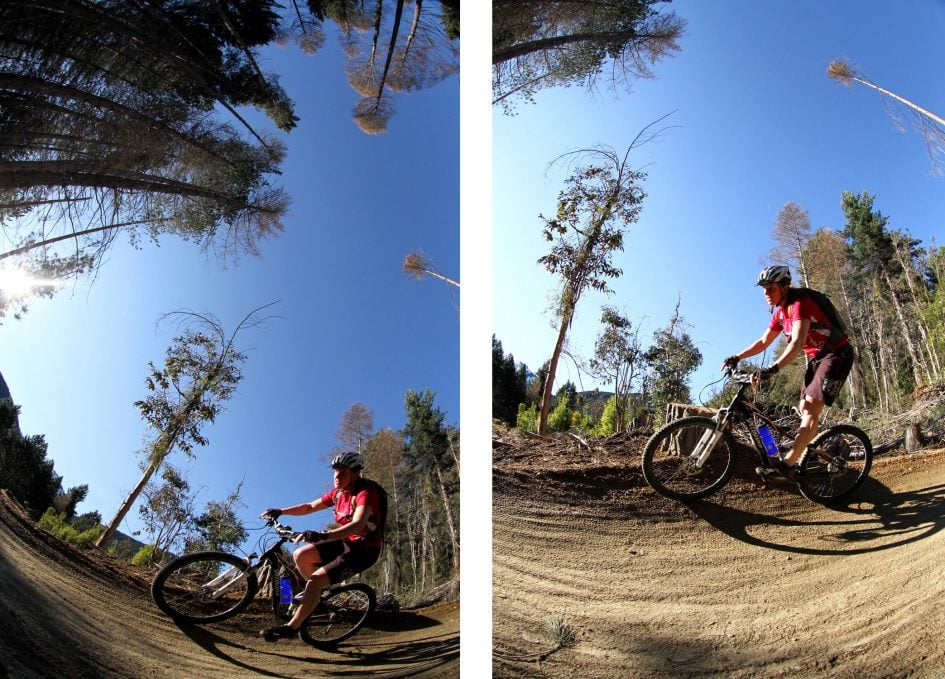
The large field of view also had interesting implications on perspective and composition. By changing your position in relation to the subject you can affect the perspective in some really interesting ways.
Canon EF 8-15mm Fisheye perspective on EOS 7D body at 10mm
In the photo above left, you can see the trees from behind me creeping into the top of the frame. For this image I was lying flat on my back shooting nearly straight up. By comparison look at the above right, shot from nearly the same place from a higher (I was kneeling) camera position for the difference.
Lens distortion also has some interesting effects on the final image outcome. Once you move the subject out of the centre sweet-spot you really start curving things around. You can use this to your advantage or perhaps detriment.
Full-frame Fisheye on EOS 7D: Manual, 1/1600, f4, 2500 ISO, 8-15mm at 9mm
In the image above, you can see the cyclist on the left of the frame appears to be heading down a steep decline towards camera. The lens has amplified the steepness of the slope she is riding. The slope in reality is a slight hill and the palm tree behind her is dead vertical and should be parallel with the left-hand edge of the frame.
This lens distortion, and by distortion I’m referring to distortion of reality, is an interesting point. Photography is all about interpreting a scene and lenses are a tool for that interpretation. This lens really allows a photographer to manipulate a scene in-camera into a perceived reality that might not necessarily represent what was ‘actually’ there. How that fits into your photography ethics, style and aesthetic choice is up to the individual and this review isn’t necessarily the place for that debate. I for one like the altered reality and artistic perspective this lens helps you create – it’s just another tool in the toolbox.
What would I use this lens for? It’s a fantastic action sports lens and I would definitely use it to shoot mountain biking, rock climbing, skiing and skateboarding. This lens also allows you to shoot in some really tight spots. Rock climbing photography for example – often the logistics and safety factors of climbing photography means that you have to be very close to your subject when shooting. This lens will allow you to shoot not only the climber, but what they are climbing too. It would also excel in traditional sports photography – football, rugby, hockey, etc. It also does well as an artistic lens where the wide angle distortion is part of the aesthetic. Shooting bands from the photo pit, making a big crowd look massive and so on.
Full-frame Fisheye on EOS 7D: Manual, 1/6400, f4.5, 1000 ISO, 8-15mm at 10mm
It is possible to use this lens for non-extreme lookimg shots too. In the image above, you can see that by keeping the main subject in the sweet spot in the centre there is little if any distortion.
Post production
I was really impressed with the quality of the images. The overall sharpness and image quality was fantastic. No complaints there. I’ll let Gordon handle the technical side of the review.
Scott’s verdict
Would I choose this lens? Maybe. As my 7D, with its cropped frame is my workhorse body and I’m not a fan of the vignetted fisheye look the jury is still out as to whether this is the best ultra-wide for my purposes. For substantially less money I can get the Canon EF-S 10-22mm lens, which everyone is in agreement is a fantastic piece of glass and even optically a bit faster at the wide end. The question then really comes down to: do I need those last 2mm, and the distortion of a fisheye image?
What the 8-15mm has over the 10-22mm is the build. The 8-15mm is weather sealed and better suited for wet environments like the snow. On the other hand the convex lens is asking for trouble in the rough world of action photography. There are of course other wide angle L series lenses available, but none that are all that wide when mounted on a cropped-frame body.
For the photographer who shoots full frame or has a variety of cropped and full frame bodies this lens offers some great versatility. If I fitted into that category I’d definitely be getting ready to throw down the visa for this lens. But that’s not me – for me, the proven quality, non redundant mm’s of zoom and price steers me to the 10-22mm as my ideal super-wide zoom.
As a stand alone lens and not comparing it to others on the market though, the EF 8-15mm Fisheye is an outstanding piece of glass that in the right hands will create some killer images. Optically it’s very impressive and if you are looking for a lens that will give you outstanding fisheye to ultra wide performance in a package that’s future-proof for whatever body you shoot next, this lens is without rival. You can expect to see quite a few of these under the Christmas tree this year and a trend towards ultra-wide in action sports photography – and I say bring it on!
Canon EF 8-15mm Fisheye field report: Stefan Haworth
About Stefan Haworth: Being based in Queenstown, New Zealand it’s a great place to be a photographer. There’s a lot competition but such a variety to shoot. Born here I’ve been able to live with sports of all types all around me. That potential I’ve been able to go out on my days off to play with new ideas helping progression. Now with the technology progressing it’s amazing what flashes can do. I’ll be that guy figuring how can I add flash to the mix.
Funky facts about me:
– Summer lover.
– Just changed to Mac and love it.
– Love em, don’t hate em, Apple a day keeps the doctor away.
– Listening to Jack Johnson as I type.
TappedNZ Photography Blog
Follow Stefan Haworth on Google+
I recently got to test the new Canon 8-15mm fisheye f/4L. Many will say it’s a novelty, some will depend on it, while others will literally froth at the mouth. I’ve gone through my pros and cons of the lens to see if it’s on my own wish list.
When it was announced I was amped myself as it meant we could now shoot ‘true’ fisheye on any Canon body with Canon-branded glass. That also means the option to now shoot diagonal fisheyes at 10fps on an EOS 1D Mark IV. Previously if we wanted to shoot 10fps with a fisheye we had to sacrifice a little of the coverage due to the 1.3x crop or get a third party lens. So who should be excited? Apart from APS-H owners, anyone who owns an APS-C crop body camera or a mixture of Canon DSLR formats. They’ll be able to achieve fisheye coverage across the crop field. For example surf photographers can grab the 8-15mm and use it on the 7D for fast frame rate and focus on a relatively light body.
Now I’ve seen it and played with it, what am I thinking? The ‘ampness’ has died down to be honest. It could be because I mostly use the Canon 5dII which has had a fisheye option for ages with the old EF 15mm. So if you use the 8-15mm at 15mm on a full-frame body, you’re getting the same view.
Below 15mm is new though, and now all the way to 8mm. But that’s even more of a novelty in my point of view. Having say 50 or even 20 images all done at 15mm, they can all start to look similar let alone trying it at 8mm. I know when I tried the Sigma 8mm 3.5 I was like “WOOOW this is wack”. I got a bit bored after a while. The black area just becomes a space waster, a waste of Megapixels. I can see some people enjoying it on a full frame camera but that’s not really where I am at with the lens.
That sounds like I’ve said it’s a bad lens, but it’s not. It’s just not for me at the moment. If you’ve got a 1.3x crop body or even more a 1.6x crop body it’ll be for you. When I got my first DSLR the first lens I wanted was a fisheye then to my disappointment you had to have a fullframe to achieve the warped look – bugger. So now all those people with 550D / T2i’s, 60D’s, 7D’s or alike can now go out and grab this lens and have some fun with fisheye photos. Yeah ok, the Iphone has had an fisheye extension lens for some time now but it’s just not the same.
Build quality
It’s an L lens so overall it’s pretty good. It’s more that some design aspects have let it down.
Due to the front element being convex or ‘shaped like a bubble’ it’s very exposed to surroundings. If you’ve got the camera dangling off your neck you’ll see what I mean, the lens is facing down and you’ve a high chance of knocking something if you’re not careful. You might not do that but even holding it you’ve got to be careful. It’s not a lens you’ll want to scratch either. Canon’s got a solution to this and added a lens hood. But if you’re going wider than 14mm on a full-frame, you’ll have to take the hood off so it doesn’t appear in your frame – it’s that wide.
So you’ve got the large lens cap that fits over the lens hood because of the shape. It’s seems okay, going on and off with ease – but too effortless really. While shooting up at Snowpark I had just brushed the cap while waiting for the skier and it fell right off. It was quite windy and I was standing on groomed snow so the cap started quickly rolling – luckily I grabbed it before it tumbled 50m down the hill. It’s not something you want to muck around with during a shoot, or something you’d want to lose. Other photographers have picked up on this too. I’d say it’s probably the most annoying part of the lens. I can imagine if I wasn’t careful the lens cap could fall off in the bag and something rub against the front element – eekk.
Some may argue the 15mm 2.8 is worse but, like a photographer I know, you could just put a few pieces of tape on the inside of the cap to give it more grip. I’m not sure whether something similar could work for the 8-15mm. We’ll have to see what people do to fix this problem.
What’s interesting though you can take off the lens hood at the same time as the cap if you need to take a picture at a wide mm. That saves having your hands full, as otherwise you’d still be mucking around putting each item into a pocket wasting time. I liked that time saver!
When adjusting the focal length on the 8-15mm, you’ll see the front element pop in and out; in this respect it’s similar to the motion of other Canon wide lenses when they focus. Whether this motion is due to the zoom or the focus, I’m not a major fan since having a mare of a shoot where flour was sucked into a 17-40. So to solve that I now always pop a UV filter on the front of my lenses, keeps them in good condition and safe. Sadly you’ve got to take extra care of the 8-15mm as due to the convex shape of the lens you cant attach a filter. Even though being weather sealed it isn’t fully protected due to the front element moving within the barrel.
Image Quality
I tested it up in the snow with skiers in perfect blue sky so it wasn’t the best place to see chromatic aberration or image sharpness etc. I’ve heard the chromatic aberration isn’t that great but Gordon’s tests will show that.
What I did do though was play with the sun star while skiers were in the air after hitting the jump. If you don’t know too much about the sun star effect, grab a wide lens, pop the camera on aperture priority, then try f4 and aim it at the sun on a clear blue sky. Then try it on f16 or above. You’ll notice you caught a nice star. Different lenses have different stars depending on aperture blades and the shape.
Diagonal Fisheye on EOS 5D Mark II: Manual, 1/2500, f20, 1000 ISO, 8-15mm at 15mm
So with the current world’s best skier Jossi Wells throwing down double cork 1260 mute grab – say what? That’s flipping twice and spinning three and half revolutions as he holds his skis then landing backwards. So ‘photo-wise’ that’s a lot of moving as he spins over a 60ft jump. So you need a high shutter to freeze the movement as well as a low aperture for the sun star, then high ISO to compensate.
Circular Fisheye on EOS 5D Mark II: Manual, 1/2000, f20, 1000 ISO, 8-15mm at 8mm
My Canon 17-40mm f/4L gets a good sun star around f/13-18, any higher it’s darker than you’d want. Using the 8-15mm the sun star starts around f/16 but nicer at f/22. That’s quite dark so I had to use an ISO around 1000 which isn’t great for large prints.
Conclusion
So is it for me? No. As a mostly full-frame shooter, I’d prefer the Canon 15mm f/2.8 fisheye prime lens unless of course I started grabbing a crop-body more often. The older prime is smaller, lighter, delivers a better sun star, and has a better lens cap design. That would be my main lens to compare with the 8-15mm as I mostly use fullframe.
Of course if you shoot with cropped bodies or a mix, then it’s a different story. And while I’d prefer the EF 15mm for my 5dII, it’s important to remember the new 8-15mm is an L lens so has all the bells and whistles which come with it: better weather-proofing, superior build quality, decent glass, USM focusing. In this article I’ve picked the 8-15mm apart, sometimes making it seem not that great, but it’s these other points that can make the difference from a good lens and a bad lens in my opinion.
So me, I’m going to grab the older 15mm f/2.8 fisheye before they’re no more; the Sigma 2.8 is very similar so that’s another option if you agree with me and miss the boat on the Canon. When I’ve got the fisheye in my pack its not a go-to lens for the ‘in-case’ moment so I wouldn’t want any further weight and space taken up by it.
[geot][/geot]PS – if you find my work useful don’t forget you can support me when you shop for anything at [geot country=”US”]Amazon.com[/geot][geot region=”UK”]Amazon.co.uk[/geot][geot region=”Germany”]Amazon.de[/geot][geot region=”France”]Amazon.fr[/geot][geot region=”Spain”]Amazon.es[/geot][geot country=”Italy”]Amazon.it[/geot][geot country=”Canada”]Amazon.ca[/geot][geot exclude_region=”UK,Germany, France,Spain” exclude_country=”Italy,Canada,US”]eBay[/geot], B&H or Adorama by first clicking through to them using the links here – it works for anything you order at any time, or alternatively you could treat yourself to my [geot country=”US”]In Camera book[/geot][geot region=”UK”]In Camera book[/geot][geot region=”Germany”]In Camera book[/geot][geot region=”France”]In Camera book[/geot][geot region=”Spain”]In Camera book[/geot][geot country=”Italy”]In Camera book[/geot][geot country=”Canada”]In Camera book[/geot] or treat me to a coffee! Thanks!
 The Canon EF 8-15mm f4L Fisheye USM is a unique lens which delivers 180 degree Fisheye images to all three of its sensor formats: APS-C, APS-H and full-frame, while owners of the latter also get to enjoy full circular Fisheye images too. This makes it a very flexible option for owners of multiple Canon bodies employing different sensor sizes and the optical quality is excellent. The build quality is also a big step up from the discontinued EF 15mm f2.8 Fisheye and now boasts weatherproof construction, although the focal ratio is one stop slower and the starburst effect at the smallest apertures isn't quite as attractive. It's also worth noting there are multiple Fisheye primes available from third parties like Sigma if you're only using one body and don't need both full and circular images from one lens.




 Canon EF 8-15mm Fisheye perspective on EOS 7D body at 10mm